Enable Your Website in Different Languages The Easy Way – Bring In More Traffics
Website and blog owners, especially those who just started and wanted to get as many readers and subscribers from just about anywhere in the world, enabling your website and blog in different language is an absolute must! Not only you’ll get broader audiences but also you’ll get more traffics.
Website and blog owners must do this to get more and more traffic coming from just about anywhere!
I recently enabled different languages on my website https://jilaxzone.com and I couldn’t be happier. Since then, more and more traffic keep coming from various different countries and places – even coming from countries I never imagined reading my writings (eg: China, Japan).
We are all have to admit, not everyone know English. Not everybody knows the language your website is using. But probably some of them are interested or in need to know the contents of your website or blog, so why not enable different languages so that these people can get the info they are looking for and in return you get the traffic. Win-win solution, isn’t it?
It’s a one time effort. And It’s fairly easy.
Here I would like to share you how easy to enable your website and blog in different languages, with the help of Google Translate.
Find other awesome articles, tips, tricks related to Life and Tech, iOS & Android quick review on:
The steps require you to have Google account and is recommended to be done using computer.
1) Open this Google Translate link https://translate.google.com/manager/website/.
2) Login to your Google Account if prompted.
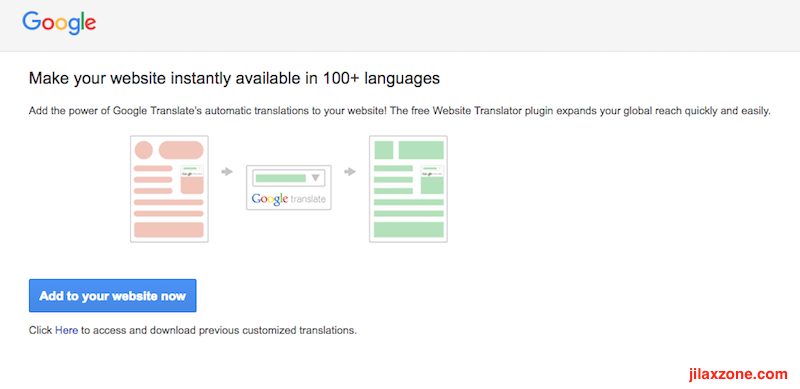
3) Click on “Add to your website now” button.
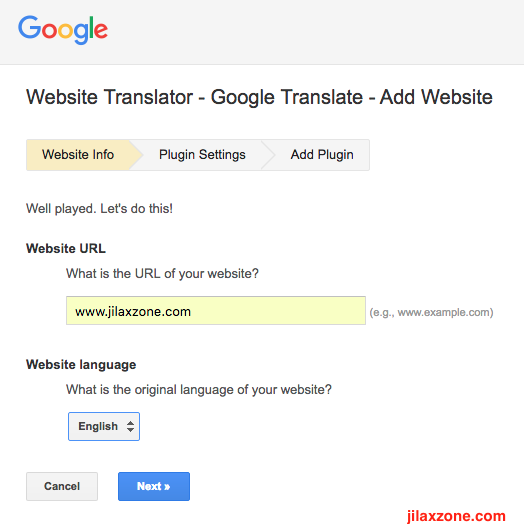
4) Under Website Info, fill in your website URL and the main language of your website. Click Next once done.
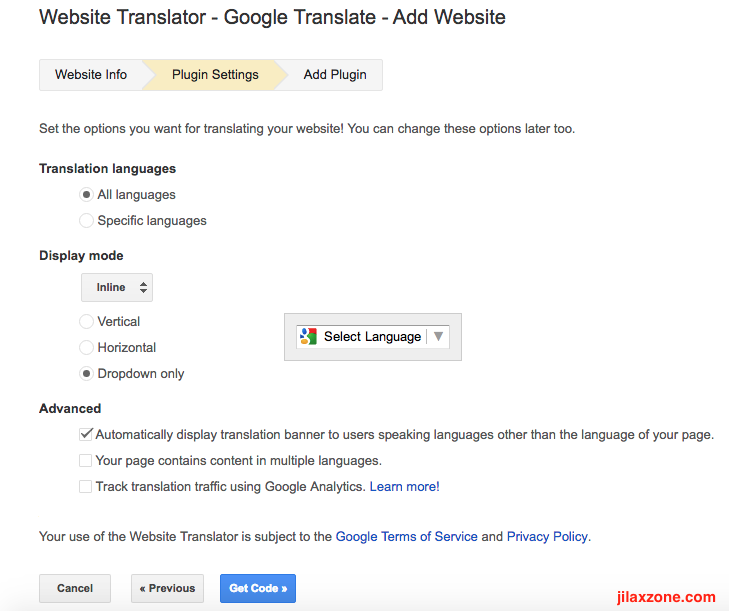
5) Under Plugin Settings, choose the Translation languages, Display Mode and Advanced.
For my website, I choose All languages for Translation languages, Vertical for Display Mode and ticked the first two for Advanced. Click Get Code once done.
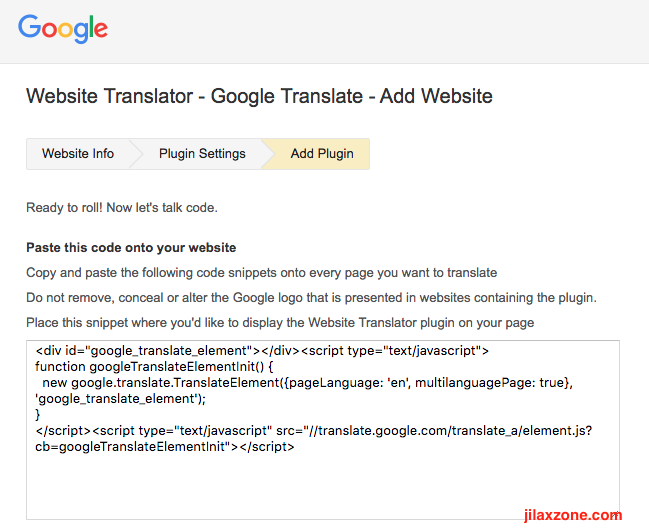
6) Under Add Plugin, you’ll see the specific Google Translate code to be embedded to your website. Copy the code.
7) Open your website, either via File Manager, SFTP or whatever method that is, paste the code you get from step 6. Recommended to paste it on the header section if you want each and every pages on your website be translated to various different languages.
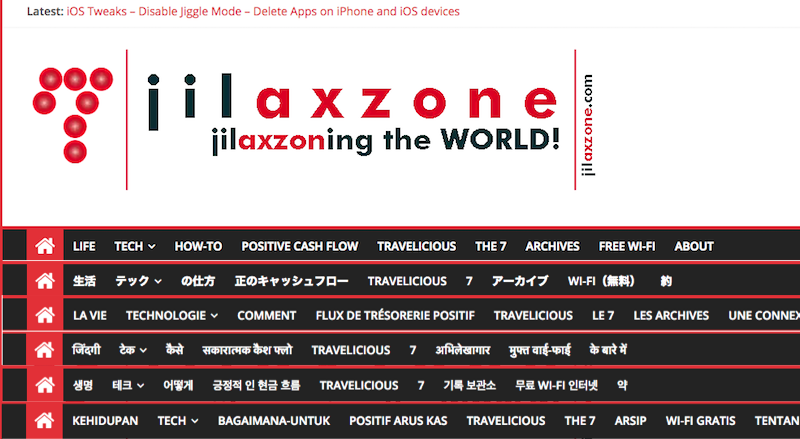
Once done, try to open your website from any browser, you should see now Google Translate widget is appearing on your website. Any visitors from any places and countries now can choose (or even Google recommend) their preferred language.
Do Give It a Try!
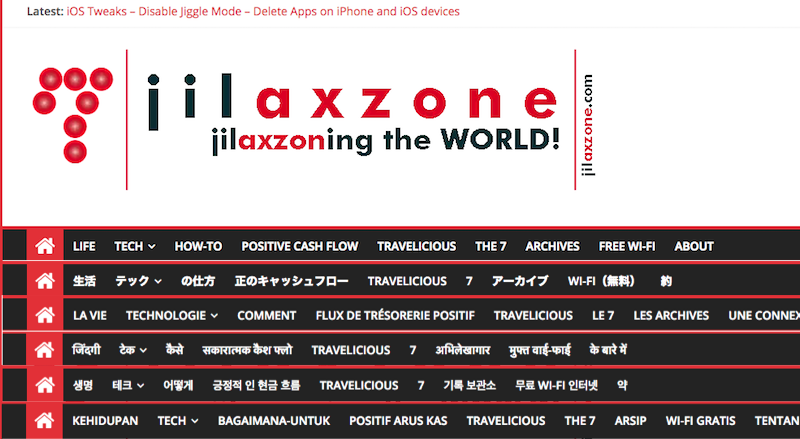
Here what it looks like on my website.
Do give a try on your website too and be surprise with incoming traffics. Cheers!
For Life & Tech tips, iOS & Android Apps and Games quick review, do visit below:
Hi, thanks for reading my article. I do spend my time and efforts writing this article based on my own experiences for my own journal as well as to share the knowledge to whoever read it so hopefully they can get the benefit out of it
If you find and feel this article is good and helping you in anyway, help me to spread the words by sharing this article to your family, friends, acquaintances so all this goodness, my spent time and efforts do not just stop at you, they will also get the same goodness and benefit from it.
Thank you!

