Windows 10 Tips: Know Your Internet Data Usage and What Applications are Hogging Your Bandwidth
Either your PC is running slow or your internet connection is running slow, have your Windows 10 Data Usage checked first to see if there’s suspicious applications/processes hogging your internet bandwidth.
Here’s how to check Internet Data Usage on Windows 10.
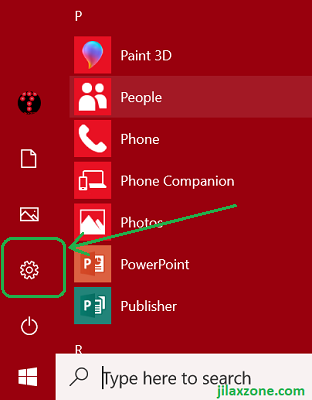
1) On Windows 10 machine, head to Settings.

2) On Windows Settings window, find “Network & Internet” and click on it.
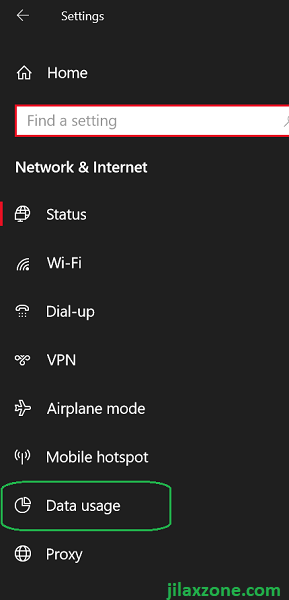
3) On the opened Network & Internet window, on the left side, scroll down and find “Data Usage”. Click on it.
4) On the Data Usage window, on the center side of the screen, under “Overview”, you should be able to see how many MB/GB/TB your PC have been using/consuming the bandwidth.
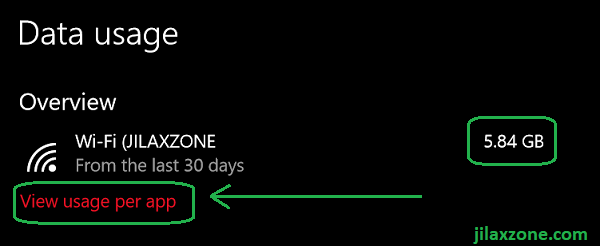
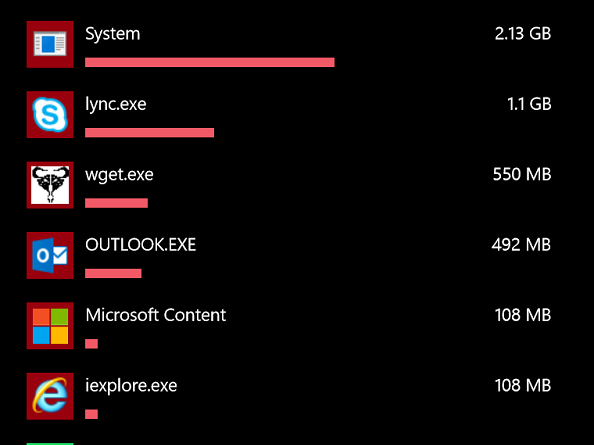
5) Click “View usage per app” to see the breakdown bandwidth usage per applications.
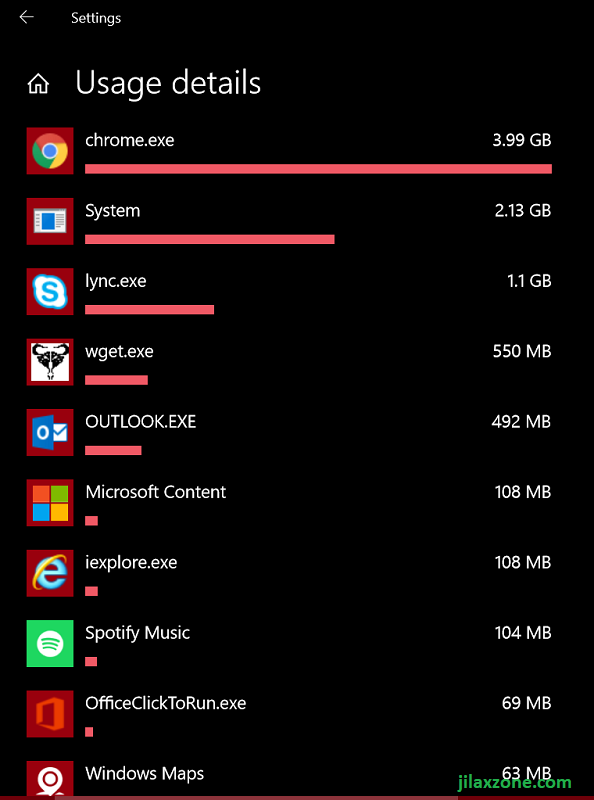
There you go. You can see all the applications that has been using your internet bandwidth the past 30 days. Do you see something suspicious? Well, if there’s something suspicious, go check and get it fixed.
Is there a way to limit the Internet Data Usage on Windows 10?
Yes, there’s a way to limit the internet usage on Windows 10 and in fact, if you are using tethered connection with limited internet quota, you should set the limit – otherwise you’ll pay the price. However the out-of-the box feature given by Microsoft can only limit system-wide, it can’t set limit per applications.
Check this article for step by step details how you can limit your internet usage and get it notified when you have reached the limit.
For Life, Tech tips, iOS and Android Apps and Games quick review, do visit below:
Hi, thanks for reading my article. Since you are here and if you find this article is good and helping you in anyway, help me to spread the words by sharing this article to your family, friends, acquaintances so the benefits do not just stop at you, they will also get the same goodness and benefit from it.
Thank you!



terimakasih tips nya sangat bermanfaat sekali
You are welcome. Sama-sama 🙂