Here’s how to activate iOS 13 Dark Mode | Works for iPadOS too!
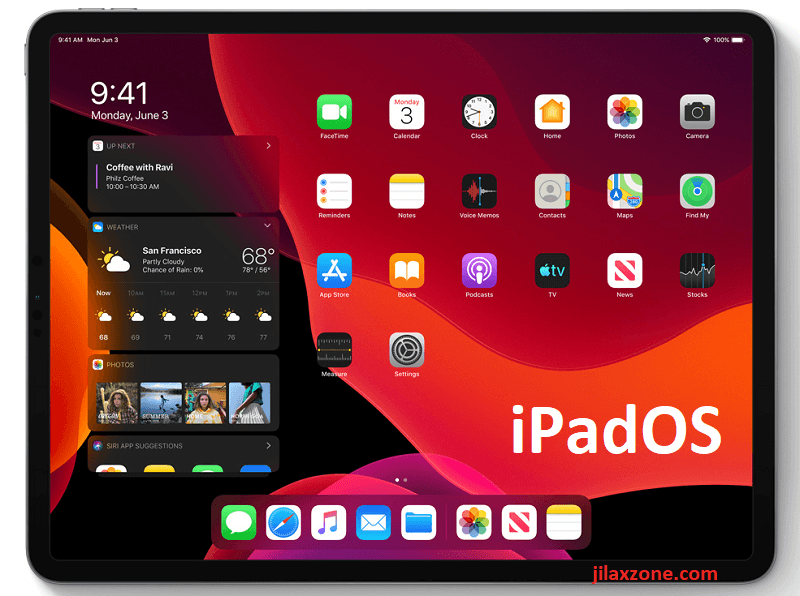
Apple finally announced and made iOS 13 official during WWDC 2019 event on 3rd June 2019 ago. As a bonus, Apple also introduced iPad new OS, called iPadOS. If you haven’t seen it, do check here for summary of iPadOS and what are the good features Apple brought for the iPad.
One of the most rumored and awaited features on iOS 13 is Dark Mode. And yes, Apple finally brought in the feature to both iOS 13 and iPadOS. When enabled, the iOS is beautifully turn everything into dark! And not just that, if you are using iPhone with OLED screen (such as iPhone XS and iPhone X), turning on Dark mode not just changed the whole appearance into dark but also saves you battery. Read here to know more about saving battery for OLED screen.
There are few ways you can turn and enable Dark mode on iOS 13. Here they are.
Here’s how to enable Dark Mode via Settings oniOS 13
1) Go to Settings, then Display and Brightness.
2) Under Display & Brightness, you’ll see new section called Appearance. Default is Light.
3) Tap Dark to activate Dark Mode on iOS 13.
Voila, you just enabled Dark Mode on iOS 13!
Here’s how to enable Dark Mode via Control Center on iOS 13
1) Open Control Center. On iPhone with Face ID (such as iPhone X, iPhone XR), swipe down from Home screen. On iPhone with Touch ID (such as iPhone 8 and before), swipe up from the Home screen.
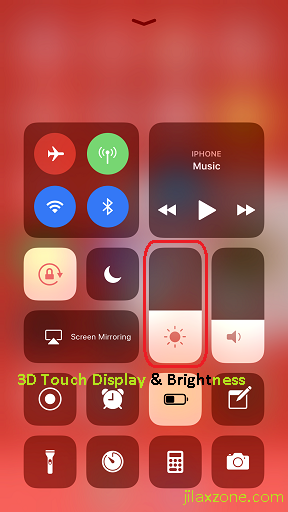
2) On Control Center window, go to Brightness section.
3) Do either a 3D Touch or Haptic Touch (just do long firm press on the screen) on the Brightness, you’ll get extra menu down there.
4) On the bottom left corner, you’ll see Appearance and the current mode – either Light or Dark.
5) Tap on the Appearance to change between Light and Dark.
Voila, you’ll just managed to switch between Light and Dark mode via Control Center.
Here’s how to enable Dark Mode Automatically on iOS 13
Though it’s automatic, but it requires efforts for at least setting it up for the first time. The steps is pretty similar to enabling Dark mode via Settings.
1) Go to Settings, then Display and Brightness.
2) Under Display & Brightness, you’ll see new section called Appearance. And right under Appearance, you’ll see Automatic.
3) Toggle Automatic on. A new menu, called Options shall appear under Automatic. Tap on Options to set the appearance schedule – when Dark mode will activate and when it’s not.
4) Inside Appearance Schedule, you’ll see 2 options: Sunset to Sunrise and Custom Schedule. By default, it will choose Sunset to Sunrise.
5) Depends on your choice:
If you choose Sunset to Sunrise, it will follow your locale settings and enable Dark mode after sunset and enable Light mode after sunrise.
However, if you choose Custom Schedule, another 2 options shall appear.
Light appearance and Dark appearance. Tap on each option to configure which hour you want the mode to activate.
iOS 13 Dark Mode explained on YouTube
In case above steps are still unclear, let’s take a look at Brandon Butch‘s YouTube video here, explaining in detail how to set-up and activate Dark mode on iOS 13.
Are you not using iOS 13 yet? Here’s how you can get it ahead of everyone
At the time this article is written, iOS 13 has just been announced. The first beta has been released – if you have Apple Developer Account, then go for it. If you don’t, you can still get iOS 13 ahead of everyone else by using the Public Beta. The Public Beta, however, is planned to be released somewhere July 2019. While waiting, you can follow the steps mentioned here to do the pre-requisite before installing iOS 13 (such as registering, back-up).
Do you have anything you want me to cover on my next article? Write them down on the comment section down below.
Alternatively, find more interesting topics on JILAXZONE:
JILAXZONE – Jon’s Interesting Life & Amazing eXperience ZONE.
Hi, thanks for reading my curated article. Since you are here and if you find this article is good and helping you in anyway, help me to spread the words by sharing this article to your family, friends, acquaintances so the benefits do not just stop at you, they will also get the same goodness and benefit from it.
Or if you wish, you can also buy me a coffee:

Thank you!
Live to Share. Share to Live. This blog is my life-long term project, for me to share my experiences and knowledge to the world which hopefully can be fruitful to those who read them and in the end hoping to become my life-long (passive) income.
My apologies. If you see ads appearing on this site and getting annoyed or disturb by them. As much as I want to share everything for free, unfortunately the domain and hosting used to host all these articles are not free. That’s the reason I need the ads running to offset the cost. While I won’t force you to see the ads, but it will be great and helpful if you are willing to turn off the ad-blocker while seeing this site.