PPSSPP – Here’s how to enable Right Analog Stick to play PSP games. Works on Android, iPhone, iPad, PC, Mac, Linux.
- This guide shares the detailed step by step how you can enable right analog stick on select PSP games when playing on PPSSPP emulator.
- This tutorial works for PPSSPP running on Android, iOS (iPhone or iPad), Windows, MacOS and Linux.
- For other interesting articles, check it out here Raspberry Pi, Linux, Windows, Xbox, PS5, Nintendo Switch, other gaming, iOS, Tech or more at JILAXZONE.
- If you find this article / content inside is already obsolete, do let me know by commenting on the comment section below so that I can update the article to reflect the latest process/news. Thanks.
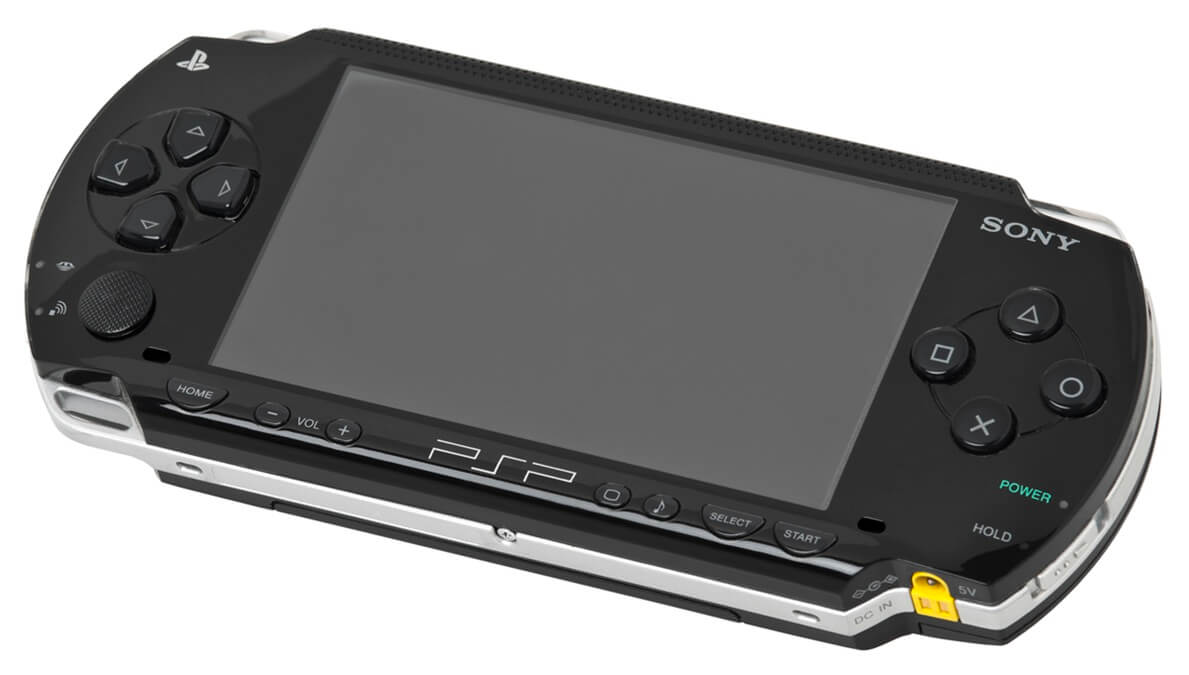
Wait, what?! Right analog stick for PSP games? Doesn’t PSP have right analog stick all along? Well, yes, the actual PSP console (whichever the models are) doesn’t come with right analog stick. However, that doesn’t stop the community to tweak around and, in this case, make/enable right analog stick for the PSP games – in fact, some of the PSP games have the right analog stick control but they are disabled by default. So, in case you are interested, do check out the steps below. While the workaround hack cannot be used on the original PSP console, you can use this with the famous PSP emulator – the PPSSPP and PS Vita. This article shares how you can enable Right analog stick to be used with PPSSPP emulator – be it on PC, Android or iOS.
Why would you want to do this?

Playing God of War or GTA series on PSP never been this fun – with 2 analog sticks enabled!
Well, for sure enabling right analog stick will make the games to have easier control, especially 3D games where you can map the right analog stick for controlling the camera movement or using it as accelerator/brake or to dodge or any shortcuts/button combination that you wish to have and use.
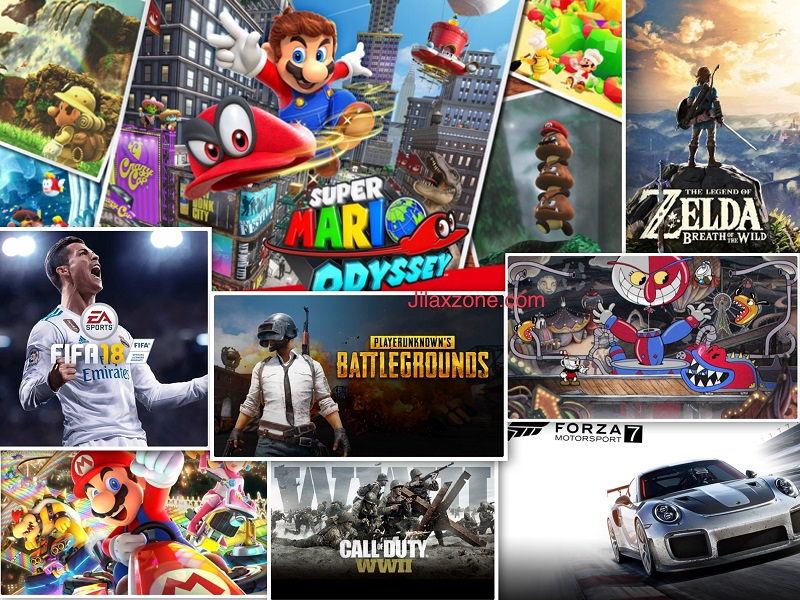
What games are supported?
These are supported games that can use the right analog sticks (which I can find during my research – so potentially there could be more).
Due to the actual PSP hardware doesn’t have right analog stick, Game developers were using various kind of techniques as a replacement for the right analog stick to control camera/do actions (such as but not limited to strife left/right, accelerate/brake). So on the game list, I will share the title, including the right analog stick patch you can use.
These are the list of PSP games that can use Right analog stick
Details how you can enable right analog stick control for each of the games stated below, refer to the sections after the game list. Do take note on the game “Right Analog Stick Method”.
| # | PSP Game Title | Right Analog Stick Method |
|---|---|---|
| 1 | 007 – From Russia with love | Using Face button |
| 2 | 50Cent BulletProof G-Unit Edition | Using L-Trigger + DPAD |
| 3 | Aliens vs. Predator Requiem | Using L-Trigger or R-Trigger only |
| 4 | Ape Escape: On the Loose | Using DPAD |
| 5 | Assassins Creed: Bloodlines | Natively supported however disabled |
| 6 | Avatar The Game | Using “Circle” button + Left Analog Stick |
| 7 | Ben 10 Alien Force: Vilgax Attacks | Using L-Trigger + Left Analog Stick |
| 8 | Ben 10 Ultimate Alien Cosmic Destruction | Using L-Trigger + Left Analog Stick |
| 9 | Crisis Core: Final Fantasy VII | Using L-Trigger or R-Trigger only |
| 10 | Coded Arms | Using Face buttons |
| 11 | Dantes Inferno | Using R-Trigger and Face buttons |
| 12 | Daxter | Using L-Trigger or R-Trigger only |
| 13 | Free Running | Using DPAD |
| 14 | Ghostbusters: The Video Game | Using Face buttons |
| 15 | Gladiator Begins | Using R-Trigger and Face buttons |
| 16 | God of War: Chains of Olympus | Using L-Trigger + R-Trigger + Left Analog Stick |
| 17 | God of War: Ghost of Sparta | Using L-Trigger + R-Trigger + Left Analog Stick |
| 18 | Grand Theft Auto Liberty City Stories | Natively supported however disabled |
| 19 | Grand Theft Auto Vice City Stories | Natively supported however disabled |
| 20 | Gun Showdown | Using Face buttons |
| 21 | Harvest Moon Hero of leaf valley | Using DPAD |
| 22 | Indiana Jones and Staff of Kings | Using DPAD |
| 23 | Iron Man | Using Face buttons |
| 24 | Iron Man 2 | Using Face buttons |
| 25 | Jak & Daxter: The Lost Frontier | Using L-Trigger or R-Trigger only |
| 26 | Manhunt 2 | Using Left Analog Stick |
| 27 | Marvel Ultimate Alliance | Using L-Trigger + Left Analog Stick |
| 28 | Marvel Ultimate Alliance 2 | Using L-Trigger + R-Trigger + Left Analog Stick |
| 29 | Medal of Honor Heroes | Using Face buttons |
| 30 | Medal of Honor Heroes 2 | Using Face buttons |
| 31 | Metal Gear Solid – Peace Walker | Using Face buttons |
| 32 | Metal Gear Solid – Portable Ops | Using DPAD |
| 33 | Miami Vice | Using “Triangle” button + Left Analog Stick |
| 34 | Midnight Club LA Remix | Using DPAD |
| 35 | Monster Hunter Freedom | Using DPAD |
| 36 | Monster Hunter Freedom 2 | Using DPAD |
| 37 | Monster Hunter Freedom Unite | Using DPAD |
| 38 | Monster Hunter Portable | Using DPAD |
| 39 | Monster Hunter Portable 2nd | Using DPAD |
| 40 | Monster Hunter Portable 3rd | Using DPAD |
| 41 | Motorstorm Arctic Edge | Using DPAD |
| 42 | Obscure: The Aftermath | Using DPAD |
| 43 | Peter Jackson’s King Kong | Using Face buttons |
| 44 | Pirates of the Caribbean – Dead man’s chest | Using L-Trigger or R-Trigger only |
| 45 | Prince of Persia – Revelations | Using L-Trigger + Left Analog Stick |
| 46 | Prince of Persia – Rival Swords | Using L-Trigger + Left Analog Stick |
| 47 | Ratatouille | Using L-Trigger or R-Trigger only |
| 48 | Ratchet & Clank Size Matters | Using L-Trigger or R-Trigger only |
| 49 | Rengoku: The Tower of Purgatory | Using R-Trigger + Left Analog Stick |
| 50 | Rengoku II: The Stairway to Heaven | Using DPAD |
| 51 | Resistance Retribution | Natively supported however disabled |
| 52 | Secret Agent Clank | Using L-Trigger or R-Trigger only |
| 53 | Silent Hill: Shattered Memories | Using R-Trigger + Left Analog Stick |
| 54 | Skate Park City | Using DPAD |
| 55 | Spiderman 2 | Using DPAD |
| 56 | Spiderman 3 | Using L-Trigger + DPAD |
| 57 | Spinout | Using Face buttons |
| 58 | Splinter Cell Essentials | Natively supported however disabled |
| 59 | Star Wars Battlefront 2 | Using Face buttons |
| 60 | Star Wars Battlefront 2 Elite Squadron | Using Left Analog Stick |
| 61 | Star Wars Battlefront 2 Renegade Squadron | Using Left Analog Stick |
| 62 | Star Wars Lethal Alliance | Using L-Trigger or R-Trigger only |
| 63 | Syphon Filter Dark Mirror | Using Face buttons |
| 64 | Syphon Filter Logan’s Shadow | Using Face buttons |
| 65 | The Godfather | Using R-Trigger + Left Analog Stick |
| 66 | The Simpsons The Game | Using L-Trigger + Left Analog Stick |
| 67 | The Warriors | Using L-Trigger + Left Analog Stick |
| 68 | Tom Clancy’s Rainbow Six Vegas | Using Face buttons |
| 69 | Tom Clancy’s Ghost Recon Advanced Warfighter 2 | Using Face buttons |
| 70 | Tom Clancy’s Ghost Recon Predator | Using Left Analog Stick |
| 71 | The Legend Of Heroes: Trails in the Sky | Using L-Trigger or R-Trigger only |
| 72 | The Legend Of Heroes: Trails in the Sky Second Chapter | Using L-Trigger or R-Trigger only |
| 73 | Tomb Raider: Legends | Natively supported however disabled |
| 74 | Tomb Raider: Anniversary | Natively supported however disabled |
| 75 | Tony Hawk’s Underground 2 | Using Left Analog Stick |
| 76 | Toy Story 3 | Using L-Trigger or R-Trigger only |
| 77 | Valkyria Chronicles 2 | Using L-Trigger + R-Trigger + Face buttons |
| 78 | Valkyria Chronicles 3: Extra Edition | Using L-Trigger + R-Trigger + Face buttons |
| 79 | Vertigo | Using Face buttons |
Here’s how you can enable right analog stick on PSP games using PPSSPP emulator.
| The steps written here are tested on: a) Latest iOS – at the time this article is written is iOS 18 Developer Beta 7 and using the iPhone that I currently have – iPhone XR. In case you are not on iOS 18 or iPadOS 18 yet, check the link here to get iOS 18 & iPadOS 18: Here’s how to update iPhone to iOS 18 today (iPad included!) at JILAXZONE. b) Latest PPSSPP for iOS – at the time this article is written is v1.17.1 which you can find on the Apple App Store. In case you are not sure, check the latest PPSSPP version here on PPSSPP official website: Download latest PSP emulator at PPSSPP.org. Should you be using different device (E.g.: Android, PC, Mac or Linux) or different version of PPSSPP, the steps may be slightly different but should not deviate too much. Anyway, in case you have questions / issues, feel free to put them down on the comment section down below, I’ll be more than happy to help you. |
Although I tested this using PPSSPP version for iOS, but all these should also works for any PPSSPP running on different devices (Be it Android, Windows, MacOS or Linux). The guidelines is split into big 2: Using Physical controller (recommended) or using Touch Screen (for iOS and Android).
If you are using physical controller
Check the supported game on the list shared above and get their “Right Analog Stick Method”. For physical controller recommendation that works great with your PC/Mac/iPhone/iPad/Android, do check my recommendation on the section below.
| # | Right Analog Stick Method | Steps How you do it |
|---|---|---|
| 1 | Using L-Trigger or R-Trigger only | a) Start PPSSPP. b) Ensure your controller is connected to the PPSSPP. c) Tap and hold the game until the game details and menu appear. d) On the game menu, tap on “Create game config”. e) Then tap on “Game settings”. f) Inside “Game settings”, go to “Controls” > “Control mapping”. g) On the left menu, enable “Allow combo mappings”. h) Under “Standard PSP controls”, find “L” (for L-Trigger), then tap “+”. You’ll be prompted to “Map a new key for L”. Move “Right analog stick” to the “left”. If you do it correctly, you should see “pad1.Z Axis-” added in to the control. i) Under “Standard PSP controls”, find “R” (for R-Trigger), then tap “+”. You’ll be prompted to “Map a new key for R”. Move “Right analog stick” to the “right”. If you do it correctly, you should see “pad1.Z Axis+” added in to the control. j) Tap “Back” until you see the “Play” button. k) Tap “Play” to start the game. |
| 2 | Using DPAD | a) Start PPSSPP. b) Ensure your controller is connected to the PPSSPP. c) Tap and hold the game until the game details and menu appear. d) On the game menu, tap on “Create game config”. e) Then tap on “Game settings”. f) Inside “Game settings”, go to “Controls” > “Control mapping”. g) On the left menu, enable “Allow combo mappings”. h) Under “Standard PSP controls”, find “Dpad Up”, then tap “+”. You’ll be prompted to “Map a new key for Dpad Up”. Move “Right analog stick” to the “up”. If you do it correctly, you should see “pad1.Z Rotation-“ added in to the control. i) Under “Standard PSP controls”, find “Dpad Down”, then tap “+”. You’ll be prompted to “Map a new key for Dpad Down”. Move “Right analog stick” to the “down”. If you do it correctly, you should see “pad1.Z Rotation+” added in to the control. j) Under “Standard PSP controls”, find “Dpad Left”, then tap “+”. You’ll be prompted to “Map a new key for Dpad Left”. Move “Right analog stick” to the “left”. If you do it correctly, you should see “pad1.Z Axis-” added in to the control. k) Under “Standard PSP controls”, find “Dpad Right”, then tap “+”. You’ll be prompted to “Map a new key for Dpad Right”. Move “Right analog stick” to the “right”. If you do it correctly, you should see “pad1.Z Axis+” added in to the control. l) Tap “Back” until you see the “Play” button. m) Tap “Play” to start the game. |
| 3 | Using L-Trigger + DPAD | a) Start PPSSPP. b) Ensure your controller is connected to the PPSSPP. c) Tap and hold the game until the game details and menu appear. d) On the game menu, tap on “Create game config”. e) Then tap on “Game settings”. f) Inside “Game settings”, go to “Controls” > “Control mapping”. g) On the left menu, enable “Allow combo mappings”. h) Under “Standard PSP controls”, find “L” (for L-Trigger), then tap “+”. You’ll be prompted to “Map a new key for L”. Move “Right analog stick” to the “up”. then tap “+” (again). You’ll be prompted to “Map a new key for L”. Move “Right analog stick” to the “down”. then tap “+” (again for the 3rd time). You’ll be prompted to “Map a new key for L”. Move “Right analog stick” to the “left”. then tap “+” (again for the 4th time). You’ll be prompted to “Map a new key for L”. Move “Right analog stick” to the “right”. If you do it correctly, you should see “pad1.Z Rotation-, pad1.Z Rotation+, pad1.Z Axis-, pad1.Z Axis+” added in to the control. In case you are wondering why you do need to do 4 times mapping into “L” button, because on the real PSP hardware, you need to hold down the “L” button before pressing other DPAD. i) Under “Standard PSP controls”, find “Dpad Up”, then tap “+”. You’ll be prompted to “Map a new key for Dpad Up”. Move “Right analog stick” to the “up”. If you do it correctly, you should see “pad1.Z Rotation-” added in to the control. j) Under “Standard PSP controls”, find “Dpad Down”, then tap “+”. You’ll be prompted to “Map a new key for Dpad Down”. Move “Right analog stick” to the “down”. If you do it correctly, you should see “pad1.Z Rotation+” added in to the control. k) Under “Standard PSP controls”, find “Dpad Left”, then tap “+”. You’ll be prompted to “Map a new key for Dpad Left”. Move “Right analog stick” to the “left”. If you do it correctly, you should see “pad1.Z Axis-” added in to the control. l) Under “Standard PSP controls”, find “Dpad Right”, then tap “+”. You’ll be prompted to “Map a new key for Dpad Right”. Move “Right analog stick” to the “right”. If you do it correctly, you should see “pad1.Z Axis+” added in to the control. m) Tap “Back” until you see the “Play” button. n) Tap “Play” to start the game. |
| 4 | R-Trigger + DPAD | a) Start PPSSPP. b) Ensure your controller is connected to the PPSSPP. c) Tap and hold the game until the game details and menu appear. d) On the game menu, tap on “Create game config”. e) Then tap on “Game settings”. f) Inside “Game settings”, go to “Controls” > “Control mapping”. g) On the left menu, enable “Allow combo mappings”. h) Under “Standard PSP controls”, find “R” (for R-Trigger), then tap “+”. You’ll be prompted to “Map a new key for R”. Move “Right analog stick” to the “up”. then tap “+” (again). You’ll be prompted to “Map a new key for R”. Move “Right analog stick” to the “down”. then tap “+” (again for the 3rd time). You’ll be prompted to “Map a new key for R”. Move “Right analog stick” to the “left”. then tap “+” (again for the 4th time). You’ll be prompted to “Map a new key for R”. Move “Right analog stick” to the “right”. If you do it correctly, you should see “pad1.Z Rotation-, pad1.Z Rotation+, pad1.Z Axis-, pad1.Z Axis+” added in to the control. In case you are wondering why you do need to do 4 times mapping into “R” button, because on the real PSP hardware, you need to hold down the “R” button before pressing other DPAD. i) Under “Standard PSP controls”, find “Dpad Up”, then tap “+”. You’ll be prompted to “Map a new key for Dpad Up”. Move “Right analog stick” to the “up”. If you do it correctly, you should see “pad1.Z Rotation-” added in to the control. j) Under “Standard PSP controls”, find “Dpad Down”, then tap “+”. You’ll be prompted to “Map a new key for Dpad Down”. Move “Right analog stick” to the “down”. If you do it correctly, you should see “pad1.Z Rotation+” added in to the control. k) Under “Standard PSP controls”, find “Dpad Left”, then tap “+”. You’ll be prompted to “Map a new key for Dpad Left”. Move “Right analog stick” to the “left”. If you do it correctly, you should see “pad1.Z Axis-” added in to the control. l) Under “Standard PSP controls”, find “Dpad Right”, then tap “+”. You’ll be prompted to “Map a new key for Dpad Right”. Move “Right analog stick” to the “right”. If you do it correctly, you should see “pad1.Z Axis+” added in to the control. m) Tap “Back” until you see the “Play” button. n) Tap “Play” to start the game. |
| 5 | Face Button (Square, Triangle, Circle, Cross) | Depending on the game, some games only has strife left/right or move camera left and right, while other games, they have camera movement to the left, right, up and down. If the game only has left and right movement, then you need to map only Circle and Square buttons. a) Start PPSSPP. b) Ensure your controller is connected to the PPSSPP. c) Tap and hold the game until the game details and menu appear. d) On the game menu, tap on “Create game config”. e) Then tap on “Game settings”. f) Inside “Game settings”, go to “Controls” > “Control mapping”. g) On the left menu, enable “Allow combo mappings”. h) Under “Standard PSP controls”, find “Triangle” icon, then tap “+”. You’ll be prompted to “Map a new key for Triangle”. Move “Right analog stick” to the “up”. If you do it correctly, you should see “pad1.Z Rotation-“ added in to the control. i) Under “Standard PSP controls”, find “Cross” icon, then tap “+”. You’ll be prompted to “Map a new key for Cross”. Move “Right analog stick” to the “down”. If you do it correctly, you should see “pad1.Z Rotation+” added in to the control. j) Under “Standard PSP controls”, find “Square” icon, then tap “+”. You’ll be prompted to “Map a new key for Square”. Move “Right analog stick” to the “left”. If you do it correctly, you should see “pad1.Z Axis-” added in to the control. k) Under “Standard PSP controls”, find “Circle” icon, then tap “+”. You’ll be prompted to “Map a new key for Circle”. Move “Right analog stick” to the “right”. If you do it correctly, you should see “pad1.Z Axis+” added in to the control. l) Tap “Back” until you see the “Play” button. m) Tap “Play” to start the game. |
| 6 | Using L-Trigger + Face Button | Depending on the game, some games only has strife left/right or move camera left and right, while other games, they have camera movement to the left, right, up and down. If the game only has left and right movement, then you need to map only L-Trigger with Circle and Square buttons. a) Start PPSSPP. b) Ensure your controller is connected to the PPSSPP. c) Tap and hold the game until the game details and menu appear. d) On the game menu, tap on “Create game config”. e) Then tap on “Game settings”. f) Inside “Game settings”, go to “Controls” > “Control mapping”. g) On the left menu, enable “Allow combo mappings”. h) Under “Standard PSP controls”, find “L” (for L-Trigger), then tap “+”. You’ll be prompted to “Map a new key for L”. Move “Right analog stick” to the “up”. then tap “+” (again). You’ll be prompted to “Map a new key for L”. Move “Right analog stick” to the “down”. then tap “+” (again for the 3rd time). You’ll be prompted to “Map a new key for L”. Move “Right analog stick” to the “left”. then tap “+” (again for the 4th time). You’ll be prompted to “Map a new key for L”. Move “Right analog stick” to the “right”. If you do it correctly, you should see “pad1.Z Rotation-, pad1.Z Rotation+, pad1.Z Axis-, pad1.Z Axis+” added in to the control. In case you are wondering why you do need to do 4 times mapping into “L” button, because on the real PSP hardware, you need to hold down the “L” button before pressing other Face buttons. i) Under “Standard PSP controls”, find “Triangle” icon, then tap “+”. You’ll be prompted to “Map a new key for Triangle”. Move “Right analog stick” to the “up”. If you do it correctly, you should see “pad1.Z Rotation-“ added in to the control. j) Under “Standard PSP controls”, find “Cross” icon, then tap “+”. You’ll be prompted to “Map a new key for Cross”. Move “Right analog stick” to the “down”. If you do it correctly, you should see “pad1.Z Rotation+” added in to the control. k) Under “Standard PSP controls”, find “Square” icon, then tap “+”. You’ll be prompted to “Map a new key for Square”. Move “Right analog stick” to the “left”. If you do it correctly, you should see “pad1.Z Axis-” added in to the control. l) Under “Standard PSP controls”, find “Circle” icon, then tap “+”. You’ll be prompted to “Map a new key for Circle”. Move “Right analog stick” to the “right”. If you do it correctly, you should see “pad1.Z Axis+” added in to the control. m) Tap “Back” until you see the “Play” button. n) Tap “Play” to start the game. |
| 7 | Using R-Trigger + Face Button | Depending on the game, some games only has strife left/right or move camera left and right, while other games, they have camera movement to the left, right, up and down. If the game only has left and right movement, then you need to map only R-Trigger with Circle and Square buttons. a) Start PPSSPP. b) Ensure your controller is connected to the PPSSPP. c) Tap and hold the game until the game details and menu appear. d) On the game menu, tap on “Create game config”. e) Then tap on “Game settings”. f) Inside “Game settings”, go to “Controls” > “Control mapping”. g) On the left menu, enable “Allow combo mappings”. h) Under “Standard PSP controls”, find “R” (for R-Trigger), then tap “+”. You’ll be prompted to “Map a new key for R”. Move “Right analog stick” to the “up”. then tap “+” (again). You’ll be prompted to “Map a new key for R”. Move “Right analog stick” to the “down”. then tap “+” (again for the 3rd time). You’ll be prompted to “Map a new key for R”. Move “Right analog stick” to the “left”. then tap “+” (again for the 4th time). You’ll be prompted to “Map a new key for R”. Move “Right analog stick” to the “right”. If you do it correctly, you should see “pad1.Z Rotation-, pad1.Z Rotation+, pad1.Z Axis-, pad1.Z Axis+” added in to the control. In case you are wondering why you do need to do 4 times mapping into “R” button, because on the real PSP hardware, you need to hold down the “R” button before pressing other Face buttons. i) Under “Standard PSP controls”, find “Triangle” icon, then tap “+”. You’ll be prompted to “Map a new key for Triangle”. Move “Right analog stick” to the “up”. If you do it correctly, you should see “pad1.Z Rotation-“ added in to the control. j) Under “Standard PSP controls”, find “Cross” icon, then tap “+”. You’ll be prompted to “Map a new key for Cross”. Move “Right analog stick” to the “down”. If you do it correctly, you should see “pad1.Z Rotation+” added in to the control. k) Under “Standard PSP controls”, find “Square” icon, then tap “+”. You’ll be prompted to “Map a new key for Square”. Move “Right analog stick” to the “left”. If you do it correctly, you should see “pad1.Z Axis-” added in to the control. l) Under “Standard PSP controls”, find “Circle” icon, then tap “+”. You’ll be prompted to “Map a new key for Circle”. Move “Right analog stick” to the “right”. If you do it correctly, you should see “pad1.Z Axis+” added in to the control. m) Tap “Back” until you see the “Play” button. n) Tap “Play” to start the game. |
| 8 | Natively supported however disabled | To enable right analog stick on any natively supported games, you have to use the cheat codes for those specific games. To get the cheat codes, here’s a good link for a start: https://forums.ppsspp.org/showthread.php?tid=22787&pid=126027#pid126027. In case the game you are looking for is not part of the list on the link shared, then do google around. a) Start PPSSPP. b) Ensure your controller is connected to the PPSSPP. c) Go to Settings > System. d) Under “Cheats” section, tap on “Enable cheats” to enable cheat menu. e) Tap “Back” to go back to game selection menu. f) Tap and hold the game until the game details and menu appear. g) On the left side, you should be able to see the game image and game title. h) Under the “Game Title”, you should see the “Game Title ID” (something like ULUS-XXXXX, UCUS-XXXXX, ULES-XXXXX, NPJH-XXXXX, NPEK-XXXXX, UCKS-XXXXX or anything started with 4-charater codes, followed by hyphen and 5-digit numbers – this is the PSP “Game Title ID”). i) Based on the “Game Title ID”, do google around to get the cheat code. Something like “ULUS-10160 right analog stick cheat code”. j) Based on what you find, copy the cheat code into the “Game Title ID”.ini (replace the “Game Title ID” with the actual Game Title ID such as “ULUS-10160.ini”). k) Open “Files” app (on iOS) or any File Manager (on Android) or Windows Explorer (on Windows), then navigate into PPSSPP folder > PSP > Cheats. l) Copy the “Game Title ID”.ini (E.g.: “ULUS-10160.ini”) into the “Cheats” folder. m) Now get back to PPSSPP. n) Tap and hold the game until the game details and menu appear. o) Tap on “Cheats”. If you are naming the “Game Title ID”.ini file correctly and place the .ini file correctly under “Cheats” folder, then you should be able to see the list of cheats available. p) Enable the cheat to use right analog stick. q) Tap “Back” until you see the “Play” button. r) Tap “Play” to start the game. |
If you are using touch screen (for PPSSPP running on iOS or Android)
| # | Right Analog Stick Method | Steps How you do it |
|---|---|---|
| 1 | Using L-Trigger or R-Trigger only | Don’t need to remap the button and instead to keep using L-Trigger and R-Trigger on-screen buttons. |
| 2 | Using DPAD | If you are not getting used to move camera using DPAD buttons, all you can do is to move the DPAD buttons to the right side of the screen. a) Start PPSSPP. b) Tap and hold the game until the game details and menu appear. c) On the game menu, tap on “Create game config”. d) Then tap on “Game settings”. e) Inside “Game settings”, go to “Controls” > “On-screen touch controls” and enable it. f) Then inside “Game settings”, go to “Controls” > “Edit touch control layout…”. g) On the left menu, tap on “Move”. h) Then tap on DPAD buttons then move it to the right side of the screen. i) Tap “Back” until you see the “Play” button. j) Tap “Play” to start the game. |
| 3 | Using L-Trigger + DPAD | We’ll create a few custom button that represents a few actual PSP buttons. a) Start PPSSPP. b) Tap and hold the game until the game details and menu appear. c) On the game menu, tap on “Create game config”. d) Then tap on “Game settings”. e) Inside “Game settings”, go to “Controls” > “On-screen touch controls” and enable it. f) Then inside “Game settings”, go to “Controls” > “Edit touch control layout…”. g) On the left menu, tap on “Customize”. h) Then enable “Custom 1”, “Custom 2”, “Custom 3” and “Custom 4” buttons. i) Then tap on “Custom 1” button. We’re going to use it for moving left/tilt camera to left. Under “Button Binding” section, tick on “L” and “Dpad Left”. Tap “Back” once done. j) Then tap on “Custom 2” button. We’re going to use it for moving up/tilt camera to up. Under “Button Binding” section, tick on “L” and “Dpad Up”. Tap “Back” once done. k) Then tap on “Custom 3” button. We’re going to use it for moving right/tilt camera to right. Under “Button Binding” section, tick on “L” and “Dpad Right”. Tap “Back” once done. l) Then tap on “Custom 4” button. We’re going to use it for moving down/tilt camera to down. Under “Button Binding” section, tick on “L” and “Dpad Down”. Tap “Back” once done. m) On the left menu, tap on “Move”. n) Then tap and move respectively on “Custom 1”, “Custom 2”, “Custom 3” and “Custom 4”, move them to the right side of the screen. o) Tap “Back” until you see the “Play” button. p) Tap “Play” to start the game. |
| 4 | Using R-Trigger + DPAD | We’ll create a few custom button that represents a few actual PSP buttons. a) Start PPSSPP. b) Tap and hold the game until the game details and menu appear. c) On the game menu, tap on “Create game config”. d) Then tap on “Game settings”. e) Inside “Game settings”, go to “Controls” > “On-screen touch controls” and enable it. f) Then inside “Game settings”, go to “Controls” > “Edit touch control layout…”. g) On the left menu, tap on “Customize”. h) Then enable “Custom 1”, “Custom 2”, “Custom 3” and “Custom 4” buttons. i) Then tap on “Custom 1” button. We’re going to use it for moving left/tilt camera to left. Under “Button Binding” section, tick on “R” and “Dpad Left”. Tap “Back” once done. j) Then tap on “Custom 2” button. We’re going to use it for moving up/tilt camera to up. Under “Button Binding” section, tick on “R” and “Dpad Up”. Tap “Back” once done. k) Then tap on “Custom 3” button. We’re going to use it for moving right/tilt camera to right. Under “Button Binding” section, tick on “R” and “Dpad Right”. Tap “Back” once done. l) Then tap on “Custom 4” button. We’re going to use it for moving down/tilt camera to down. Under “Button Binding” section, tick on “R” and “Dpad Down”. Tap “Back” once done. m) On the left menu, tap on “Move”. n) Then tap and move respectively on “Custom 1”, “Custom 2”, “Custom 3” and “Custom 4”, move them to the right side of the screen. o) Tap “Back” until you see the “Play” button. p) Tap “Play” to start the game. |
| 5 | Face Button (Square, Triangle, Circle, Cross) | Don’t need to remap the button and instead to keep using on-screen Face buttons. |
| 6 | Using L-Trigger + Face Button | Depending on the game, some games only have strife left/right or move camera left and right, while other games, they have camera movement to the left, right, up and down. If the game only has left and right movement, then you need to map only L-Trigger with Circle and Square buttons. We’ll create a few custom buttons that represents a few actual PSP buttons. a) Start PPSSPP. b) Tap and hold the game until the game details and menu appear. c) On the game menu, tap on “Create game config”. d) Then tap on “Game settings”. e) Inside “Game settings”, go to “Controls” > “On-screen touch controls” and enable it. f) Then inside “Game settings”, go to “Controls” > “Edit touch control layout…”. g) On the left menu, tap on “Customize”. h) Then enable “Custom 1”, “Custom 2”, “Custom 3” and “Custom 4” buttons. i) Then tap on “Custom 1” button. We’re going to use it for moving left/tilt camera to left. Under “Button Binding” section, tick on “L” and “Square” icon. Tap “Back” once done. j) Then tap on “Custom 2” button. We’re going to use it for moving up/tilt camera to up. Under “Button Binding” section, tick on “L” and “Triangle” icon. Tap “Back” once done. k) Then tap on “Custom 3” button. We’re going to use it for moving right/tilt camera to right. Under “Button Binding” section, tick on “L” and “Circle” icon. Tap “Back” once done. l) Then tap on “Custom 4” button. We’re going to use it for moving down/tilt camera to down. Under “Button Binding” section, tick on “L” and “Cross” icon. Tap “Back” once done. m) On the left menu, tap on “Move”. n) Then tap and move respectively on “Custom 1”, “Custom 2”, “Custom 3” and “Custom 4”, move them to the right side of the screen. o) Tap “Back” until you see the “Play” button. p) Tap “Play” to start the game. |
| 7 | Using R-Trigger + Face Button | Depending on the game, some games only have strife left/right or move camera left and right, while other games, they have camera movement to the left, right, up and down. If the game only has left and right movement, then you need to map only R-Trigger with Circle and Square buttons. We’ll create a few custom buttons that represents a few actual PSP buttons. a) Start PPSSPP. b) Tap and hold the game until the game details and menu appear. c) On the game menu, tap on “Create game config”. d) Then tap on “Game settings”. e) Inside “Game settings”, go to “Controls” > “On-screen touch controls” and enable it. f) Then inside “Game settings”, go to “Controls” > “Edit touch control layout…”. g) On the left menu, tap on “Customize”. h) Then enable “Custom 1”, “Custom 2”, “Custom 3” and “Custom 4” buttons. i) Then tap on “Custom 1” button. We’re going to use it for moving left/tilt camera to left. Under “Button Binding” section, tick on “R” and “Square” icon. Tap “Back” once done. j) Then tap on “Custom 2” button. We’re going to use it for moving up/tilt camera to up. Under “Button Binding” section, tick on “R” and “Triangle” icon. Tap “Back” once done. k) Then tap on “Custom 3” button. We’re going to use it for moving right/tilt camera to right. Under “Button Binding” section, tick on “R” and “Circle” icon. Tap “Back” once done. l) Then tap on “Custom 4” button. We’re going to use it for moving down/tilt camera to down. Under “Button Binding” section, tick on “R” and “Cross” icon. Tap “Back” once done. m) On the left menu, tap on “Move”. n) Then tap and move respectively on “Custom 1”, “Custom 2”, “Custom 3” and “Custom 4”, move them to the right side of the screen. o) Tap “Back” until you see the “Play” button. p) Tap “Play” to start the game. |
| 8 | Natively supported however disabled | To enable right analog stick on any natively supported games, you have to use the cheat codes for that specific games. To get the cheat codes, here’s a good link for a start: https://forums.ppsspp.org/showthread.php?tid=22787&pid=126027#pid126027. In case the game you are looking for is not part of the list on the link shared, then do google around. a) Start PPSSPP. b) Go to Settings > Controls. c) Under “On-screen touch controls”, find “On-screen touch controls” and enable it. d) Then under “On-screen touch controls”, Tap on “Edit touch control layout…”. e) On the left menu, tap on “Customize”. f) Then enable “Right Analog Stick (tap to customize)” button. If the game is natively supporting right analog stick, you can leave the right analog stick settings to the default (no changes required). g) Tap “Back” until you are back on the main Settings screen. h) Then Go to Settings > System. i) Under “Cheats” section, tap on “Enable cheats” to enable cheat menu. j) Tap “Back” to go back to game selection menu. k) Tap and hold the game until the game details and menu appear. l) On the left side, you should be able to see the game image and game title. m) Under the “Game Title”, you should see the “Game Title ID” (something like ULUS-XXXXX, UCUS-XXXXX, ULES-XXXXX, NPJH-XXXXX, NPEK-XXXXX, UCKS-XXXXX or anything started with 4-charater codes, followed by hyphen and 5-digit numbers – this is the PSP “Game Title ID”). n) Based on the “Game Title ID”, do google around to get the cheat code. Something like “ULUS-10160 right analog stick cheat code”. o) Based on what you find, copy the cheat code into the “Game Title ID”.ini (replace the “Game Title ID” with the actual Game Title ID such as “ULUS-10160.ini”). p) Open “Files” app (on iOS) or any File Manager (on Android) or Windows Explorer (on Windows), then navigate into PPSSPP folder > PSP > Cheats. q) Copy the “Game Title ID”.ini (E.g.: “ULUS-10160.ini”) into the “Cheats” folder. r) Now get back to PPSSPP. s) Tap and hold the game until the game details and menu appear. t) Tap on “Cheats”. If you are naming the “Game Title ID”.ini file correctly and place the .ini file correctly under “Cheats” folder, then you should be able to see the list of cheats available. u) Enable the cheat to use right analog stick. v) Tap “Back” until you see the “Play” button. w) Tap “Play” to start the game. |
If confused, check out this video by Andrew Tsai’s Tips:
So either with physical controller or touchscreen, with the above steps, you should now be able to enjoy the PSP games better!
Controllers Recommendation – Play better with Controller!
Playing retro games is always better with controller!
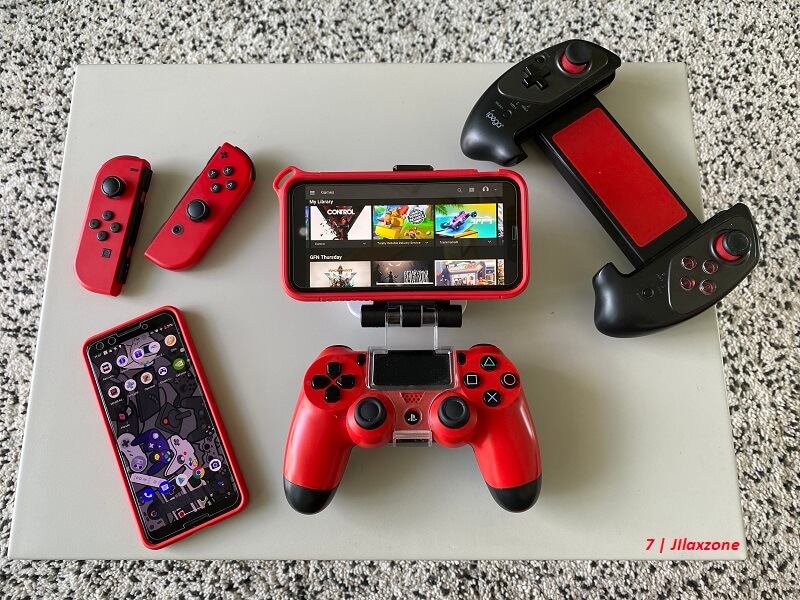
While you can always use the touchscreen of the iPhone/Android to play the games or using keyboard on PC/Mac/Linux, but for greater fun and enjoyment, I would recommend you to play the games with the Controller using physical buttons – so the experience is (almost) the same as the original. Just in case you need recommendation, here they are. I am personally using Nimbus and DualShock 4 to play the games.
All controllers’ images shown below are trademarks of the respective owners.
8BitDo M30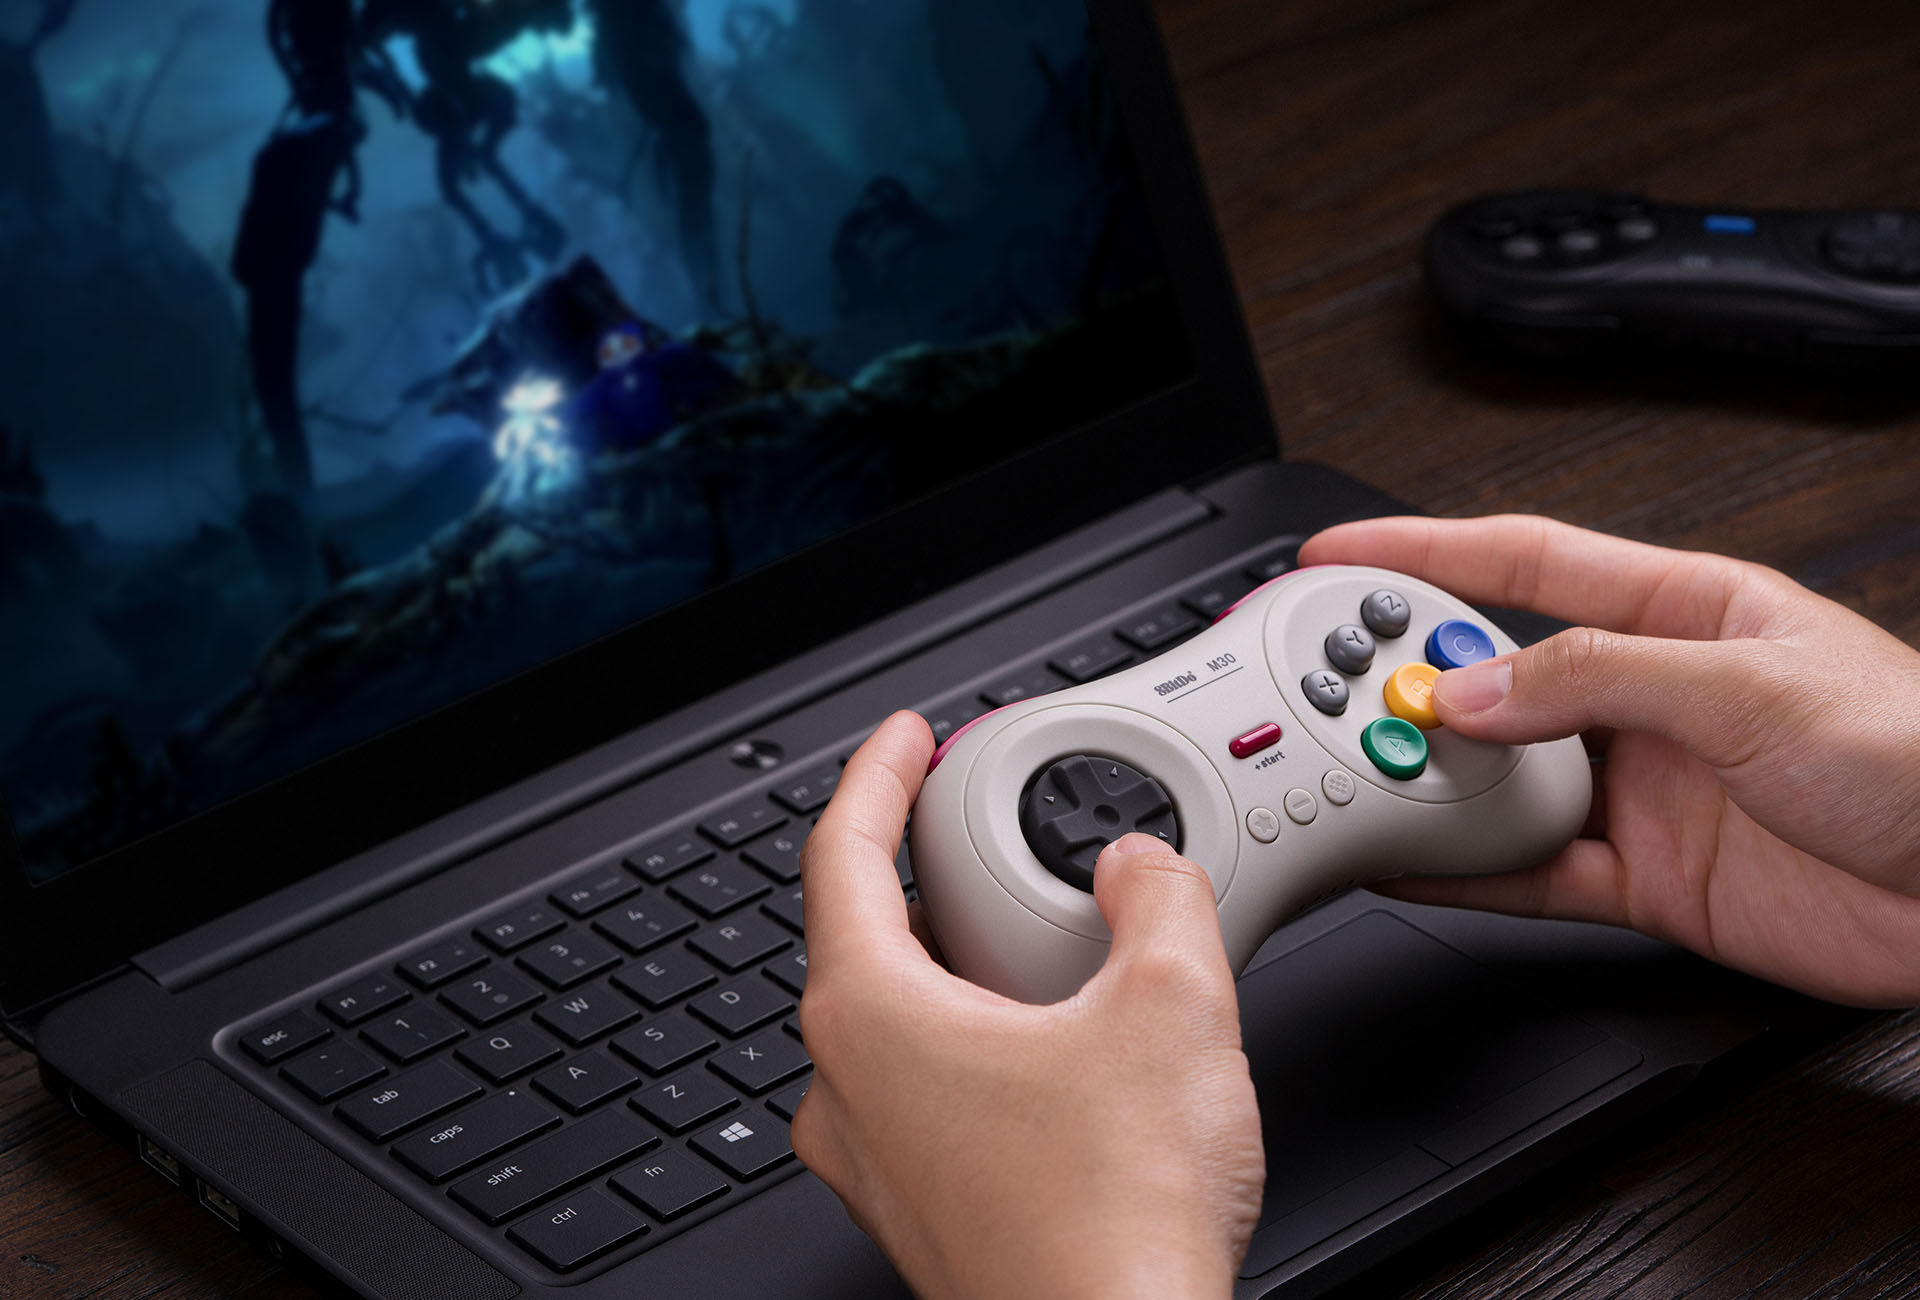 | The Bluetooth controller that looks like the 6-button SEGA Genesis / Mega Drive controller. Compatible with Android / iOS / Windows / Mac / Raspberry PI OS / Batocera / RetroPie. Get 8BitDo M30 on Amazon Get 8BitDo M30 on AliExpress Get 8BitDo M30 Android/iPhone Clipper on AliExpress |
Backbone Controller 2nd Generation with USB-C / Lightning | The controller that uses USB-C (or lightning) to connect. Very handy and portable to carry around. Compatible with Android / iOS / Windows / Mac. Get Backbone Controller on Amazon |
Razer Kishi | Best telescopic controller for iPhone. It comes with Lightning connector for passthrough charging as well as better low-latency gaming. Compatible with Android / iOS. In case you need it: Get Razer Kishi for Android on Amazon Get Razer Kishi for Android on AliExpress Get Razer Kishi for iPhone on Amazon Get Razer Kishi for iPhone on AliExpress |
SteelSeries Nimbus+ | For playing iOS games. I like it because it’s MFi certified – Made for iOS, any controller-compatible games will for sure run with this controller. In case you need it: Get SteelSeries Nimbus+ on Amazon Get Nimbus iPhone clipper on AliExpress. |
Xbox Series X|S Wireless Controller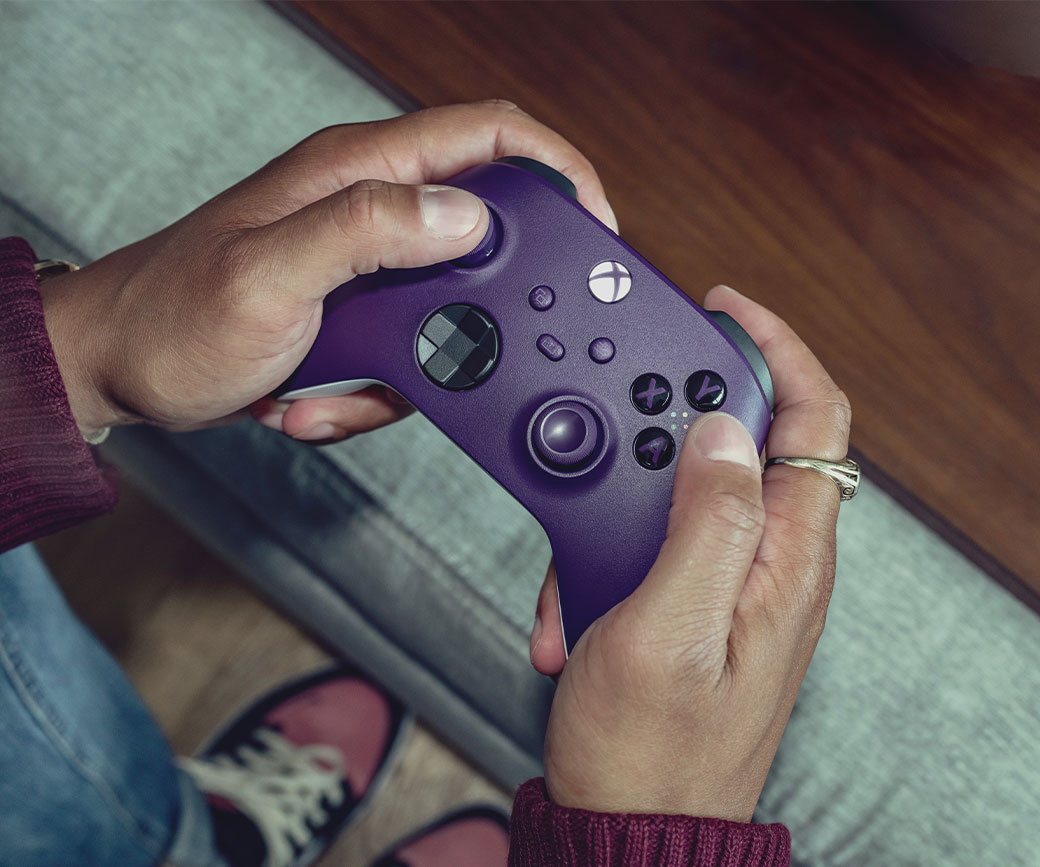 | Great controller from Xbox compatible with your Xbox (of course!) as well as Windows PC, Android and iOS, recommended for those with big hands. Read here for pairing Xbox Series X|S Controller with your iPhone at JILAXZONE. In case you need it: Get Xbox Series X|S Wireless Controller on Amazon Get Xbox Series X|S Android/iPhone Clipper on AliExpress Get Xbox One Controller on Amazon Get Xbox One Controller on AliExpress Get Xbox One Android/iPhone Clipper on AliExpress |
PS5 DualSense | Awesome controller from PlayStation compatible with your PS5 (of course!) as well as Android and iOS, recommended for those with smaller hands. Compatible with Android / iOS / Windows / Mac. Read here for pairing PS5 DualSense Controller with your iPhone at JILAXZONE. In case you need it: Get PS5 DualSense on Amazon Get PS5 DualSense Android/iPhone Clipper on AliExpress |
PS4 DualShock | While DualSense is the latest PlayStation controller but doesn’t mean DualShock 4 is bad. DualShock 4 is indeed one of the cheaper alternatives to get into gaming on your Android and iOS, recommended for those with smaller hands. Compatible with Android / iOS / Windows / Mac. In case you need it: Get PS4 DualShock 4 on Amazon Get PS4 DualShock 4 on AliExpress Get PS4 DualShock 4 Android/iPhone Clipper on AliExpress |
Here’s my own setup:
Note: If you buy anything from Amazon / AliExpress using links above, I will earn a small commission at no extra cost charged on your purchases.
Bring it all together
With Right analog stick patch enabled, many of supported PSP games will definitely run ways better than before. How many games have you tried and what are their types? In case you encountered any difficulties and/or have queries, don’t hesitate to put your queries or thoughts on the comment section down below. I’ll be happy to assist.
For other gaming related articles, be sure to check out these: Gaming & Games at JILAXZONE.
Important Links I read and used to enable this PPSSPP Right Analog Stick Hacks
Important Links where I get all the materials to test on my own PPSSPP emulator and to make this article possible – courtesy of the respective posters, thank you to YOU! – without you posting this, this won’t be possible:
Do you have anything you want me to cover on my next article? Write them down on the comment section down below.
Alternatively, find more interesting topics on JILAXZONE:
JILAXZONE – Jon’s Interesting Life & Amazing eXperience ZONE.
Hi, thanks for reading my curated article. Since you are here and if you find this article is good and helping you in anyway, help me to spread the words by sharing this article to your family, friends, acquaintances so the benefits do not just stop at you, they will also get the same goodness and benefit from it.
Or if you wish, you can also buy me a coffee:

Thank you!
Live to Share. Share to Live. This blog is my life-long term project, for me to share my experiences and knowledge to the world which hopefully can be fruitful to those who read them and in the end hoping to become my life-long (passive) income.
My apologies. If you see ads appearing on this site and getting annoyed or disturb by them. As much as I want to share everything for free, unfortunately the domain and hosting used to host all these articles are not free. That’s the reason I need the ads running to offset the cost. While I won’t force you to see the ads, but it will be great and helpful if you are willing to turn off the ad-blocker while seeing this site.