- This article detailed the steps required to setup and use Google Photos Locked Folder.
- In case you have queries, post them on the comment section below.
- For other interesting articles, head to: Android, iOS, Games and Gaming, Tech, FREE Games and Stuffs and more on JILAXZONE.
- If you find this article / content inside is already obsolete, do let me know by commenting on the comment section below so that I can update the article to reflect the latest process/news. Thanks.
Now you can hide your private photos and videos – that are not meant to be seen by anyone else other than yourself – easily. Google recently announced this particular enhancement back in Google I/O 2021 and called this feature which can hide and secure your photos and videos as Google Photos Locked Folder or Locked Folder in short.
So what does actually Google Photos Locked Folder do?
In summary, Google Photos Locked Folder does these:
- Hide photos & videos from your photo album and from your Google Photos library, search and apps that access your device photos.
- Photos & videos inside the Locked Folder won’t be backup to Google Photos cloud nor shared.
Prerequisites to use Google Photos Locked Folder
Before you can setup and use Google Photos Locked Folder, here are the prerequisites you have to meet.
- Latest Google Photos app. Update yours here: Google Photos at Google Play Store.
- Need to setup device screen lock. In case you have not setup any, on your Android device, go to Settings > Security > Screen Lock to setup.
- Google Pixel 3 devices or newer. At the time this article is written, unfortunately Google has just released this feature for Google Pixel devices only. Hopefully, Google will soon let other devices to use this feature.
Here’s how to setup Google Photos Locked Folder
The following setup is just one time setup per one Google account.
1) Open Google Photos app.
2) On the bottom navigation, tap on Library > Utilities > Set up Locked Folder.
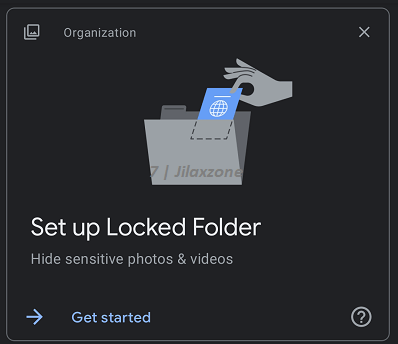
3) Under Set up Locked Folder, tap “Get started”.

4) Read the instruction, tap “Set up Locked Folder” if you are good to go.
5) When prompted for screen unlock option, choose the one you like and secure (E.g.: to use PIN rather than fingerprint sensor) and authenticate yourself.
6) You should see “Nothing here yet”.
When you have seen “Nothing here yet”, means you have successfully setup Locked Folder in Google Photos.
Here’s how to move photos and videos to Google Photos Locked Folder
Do the following to move your photos and videos into Google Photos Locked Folder.
1) Open Google Photos app.
2) On the bottom navigation, tap on Library > Utilities > Locked Folder.
3) When prompted, authenticate yourself.
4) Tap on “Move items” (if this is the first time you are using Locked Folder) or tap on “+” icon (if you have added in photos and videos before).
5) Select any photos and videos you want to store inside the Locked Folder.
6) Once all photos and videos have been selected, tap on “Move” button located on the top right of the screen.
7) Google Photos will prompt “Move to Locked Folder? Items in Locked Folder can’t be (and will stop being) backed up or shared. They also won’t appear in your Photos grid, search or apps that access your device photos.”. Tap on “Move” to proceed.
8) Google Photos will then start moving your selected photos and videos into the Locked Folder.
Depends on how many you have selected, it may take some time to move them into the Locked Folder.
Article continues below.
Popular on JILAXZONE today:
Here’s how to move photos and videos out from Google Photos Locked Folder
Do the following to move your photos and videos out from Google Photos Locked Folder, back into normal photos folder.
1) Open Google Photos app.
2) On the bottom navigation, tap on Library > Utilities > Locked Folder.
3) When prompted, authenticate yourself.
4) Tap on “…” (3-dot) button on top right of the screen to select any photos and videos you want to move out from the Locked Folder (means it won’t be inside Locked Folder anymore).
5) Once photos and videos are selected, tap on “Move”.
6) Google Photos will prompt “Move out of Locked Folder? This item can now appear elsewhere in Google Photos, synced devices and apps that access your devices photos.”. Tap on “Move” to proceed.
7) Google Photos will then start moving your selected photos and videos out from the Locked Folder.
You’ll see the messaged “Moved” once they have successfully moved out from Locked Folder.
Google Photos Locked Folder Q&A
Here are some common Q&A for Google Photos Locked Folder. In case you can’t find what you are looking for, don’t hesitate to submit your queries on the comment section down below, I’ll be happy to help.
Q: I can’t see Locked folder option on my Google Photos, what should I do?
At the time this article is written, Google Photos Locked Folder has only be released for Google Pixel devices (Pixel 3 and up), so if you are not using Google Pixel devices, at the moment, you won’t see the feature enabled.
However, it’s worth to try checking Google Play Store to see if there’s update on Google Photos, if there is, go and update your Google Photos app and check back in case now you can see the Locked Folder feature enabled on your device.
Q: Is it possible to create new folder inside Google Photos Locked Folder?
A: At the current moment, it’s not possible.
Do you have anything you want me to cover on my next article? Write them down on the comment section down below.
Alternatively, find more interesting topics on JILAXZONE:
JILAXZONE – Jon’s Interesting Life & Amazing eXperience ZONE.
Hi, thanks for reading my curated article. Since you are here and if you find this article is good and helping you in anyway, help me to spread the words by sharing this article to your family, friends, acquaintances so the benefits do not just stop at you, they will also get the same goodness and benefit from it.
Or if you wish, you can also buy me a coffee:
Thank you!
Live to Share. Share to Live. This blog is my life-long term project, for me to share my experiences and knowledge to the world which hopefully can be fruitful to those who read them and in the end hoping to become my life-long (passive) income.
My apologies. If you see ads appearing on this site and getting annoyed or disturb by them. As much as I want to share everything for free, unfortunately the domain and hosting used to host all these articles are not free. That’s the reason I need the ads running to offset the cost. While I won’t force you to see the ads, but it will be great and helpful if you are willing to turn off the ad-blocker while seeing this site.

