


With LiveContainer, you can bypass the limit of max 3 sideloaded apps, run unsigned IPA & compatible with JIT.
- This tutorial detailed the steps to install, setup and use LiveContainer to bypass the 3 sideloaded apps limit, run any unsigned IPA including how to use it with JIT.
- No jailbreak nor any forms of subscriptions is required.
- This tutorial though intended for iPhone but works the same for iPad.
- For other interesting articles, check it out here Raspberry Pi, Linux, Windows, Xbox, PS5, Nintendo Switch, other gaming, iOS, Tech or more at JILAXZONE.
- If you find this article / content inside is already obsolete, do let me know by commenting on the comment section below so that I can update the article to reflect the latest process/news. Thanks.
What is LiveContainer?
If you ever heard VM (Virtual Machine) or Docker, LiveContainer use the same concept. It’s basically a main app that can store multiple (sideloaded) apps and run them when required. Your iPhone/iPad is the main host. LiveContainer is the “VM” that enables the host (iPhone/iPad) to install more than just 3 sideloaded apps and run any compatible sideloaded apps without the need to uninstall-reinstall. Big kudos to Duy Tran (a.k.a khanhduytran0) and other contributors that make this possible.

Why & What do you need LiveContainer for? Here are some Practical Use Cases
Sideload more than 3 apps, including emulators, UTM, all kinds of IPA.
To cut it short, if you have a paid Apple Developer account and cert, you don’t need LiveContainer, because you can sideload any number of apps into your iPhone / iPad. However, if you don’t have the paid Apple Developer account and cert (or basically you are using the free Apple Developer account and cert), you are only entitled to sideload max 3 apps.
With LiveContainer, the capped of 3 sideloaded apps is basically bypassed. LiveContainer enables you to install as many sideloaded apps as you want (well, as of LiveContainer version 3.3.0, number of apps you can sideload is actually 128 per container – total 128 apps are still a lot especially when compared your original entitlement of max 3 sideloaded apps).
I have personally tested it on the latest iOS 18.4 (this is the latest available iOS during the time of writing of this article) and it run perfect – not only it enables me to sideload more than 3 apps, but also, I can install any unsigned IPA and enable JIT for apps that do require JIT.
So now it’s my turn to give back to the community by at least writing this detailed step by step guidelines in a very “beginner” way, so everyone can follow the steps for installing, configuring and making full use of LiveContainer.
In case you have queries, don’t hesitate to post your questions below on the comment section. Alternatively, you can also ask and/or join and contribute to the community:
| LiveContainer github page | https://github.com/khanhduytran0/LiveContainer |
| Sideloaded Reddit thread | https://www.reddit.com/r/sideloaded/ |
| iOS Emulation Reddit thread | https://www.reddit.com/r/EmulationOniOS/ |
Here’s what you need
These are the key ingredients you need to get LiveContainer up and running.
1) iPhone
Any iPhone or iPad.
2) PC/Mac + Keyboard + Mouse (for One-Time Setup)
PC/Mac is used to do one-time setup only, to install SideStore – the gateway to your sideloading on iPhone and iPad. You can skip this in case you have SideStore (or any other means of sideloading) installed.
Since I’m using Windows PC, the steps below are tailored for Windows PC, however if you are using Mac/Linux, the steps shouldn’t be too far different. In case you don’t have PC/Mac, you can run Jitterbug using a different iPhone/iPad.
In case you are not running Windows, don’t fret. Do check out the following guidelines to get Windows VM for FREE.
| Windows 10 | Guide to get Windows 10 VM FREE & Official from Microsoft at JILAXZONE |
| Windows 11 | Guide to get Windows 11 VM FREE & Official from Microsoft at JILAXZONE |
3) USB-C/Lightning Cable (for One-Time Setup)
This is used for connecting your iPhone/iPad into PC/Mac during running installation of SideStore. You can skip this in case you have SideStore (or any other means of sideloading) installed.
4) Internet Connection
Requires on both your PC/Mac as well as on your iPhone/iPad. Because obviously we are going to download some applications.
5) Your Precious Time (for this one-time setup, around ~0.5 hour)
Depending on where you are on the setup and your Internet connection speed, the whole setup which includes one-time setup and repetitive setup, requires approximately half an hour of your precious time.
Ensure you have all of the key ingredients with you before starting.
Note: If you buy anything from Amazon / AliExpress using links above, I will earn a small commission at no extra cost charged on your purchases.
How to Install, Setup and Use LiveContainer – High Level Steps
The following are the high-level steps going to be done on this detailed step by step guideline. In case you can guess what needs to be done by just looking at the high-level steps, feel free to skip the detail steps below.
–One-Time Setup–
Step 1) (Optional) Setup and install SideStore and sideload your apps
Step 2) Download and Install LiveContainer.ipa
Step 3) Open LiveContainer app
Step 4) Patch SideStore
–Repetitive setup–
Step 5) Open LiveContainer app
Step 6) Install & Configure Sideloaded app
Step 7) Run Sideloaded app
Detailed step by step to install, setup and use LiveContainer into your iPhone and iPad
| The following steps written here have been tested to run successfully on the following environment: a) Latest iOS – at the time this article is written is iOS 18.4 and using the iPhone that I currently have – iPhone XR. In case you are not on iOS 18 or iPadOS 18 yet, check the link here to get iOS 18 & iPadOS 18: Here’s how to update iPhone to iOS 18 & iPad to iPadOS 18 today at JILAXZONE. b) Windows 11 – In case you are looking to install Windows 11, check the link here to get them installed: Getting Windows 11 and installing on your Computer at JILAXZONE. Should you be using different version of iOS or iPadOS and PC/Mac/Linux, the steps may be slightly different but should not deviate too much. Anyway, in case you have questions / issues, feel free to put them down on the comment section down below, I’ll be more than happy to help you. |
The steps below are using the following legends.
| Legends | Description |
|---|---|
| [This is a one-time setup] | Means it’s just a one-time setup. You just need to do the step one time only. |
| [This is a repetitive setup] | Means you need to do it again when you need to sideload any application and/or refresh the sideloaded apps. |


Step 1) to Step 4) are one-time setup.
Step 1) (Optional) Setup and install SideStore and sideload your apps
[This is a one-time setup]
You can skip this step if you have been using SideStore or you have been using other method to sideload your apps into iPhone.
However, if you haven’t sideload any apps before and looking for one of the best ways to sideload the apps, follow this detailed guideline to get SideStore installed and to get sideloaded apps into your iPhone: SideStore – FREE, untethered sideloading at JILAXZONE.

Step 2) Download and Install LiveContainer.ipa
[This is a one-time setup]
Get the latest LiveContainer app from the repo. Check out here for the latest version (in case they have newer version and updates):
| Check latest version | https://github.com/khanhduytran0/LiveContainer/releases |
Look for com.kdt.livecontainer_X.X.X.ipa, where X.X.X refer to the version of LiveContainer. Do download the latest version. For easier reference, let’s just call com.kdt.livecontainer_X.X.X.ipa as LiveContainer.ipa on the rest of this article.
Once downloaded, use SideStore to install LiveContainer.ipa into your iPhone.
To install, do the following these steps on your iPhone:
2a) Turn on SideStore VPN on WireGuard or turn on StosVPN.
2b) Open SideStore app.
2c) Navigate to “My Apps” tab.
2d) To install a new sideloaded app, tap on “+” button and locate the LiveContainer.ipa file. Wait until sideloading process is complete.
Refer to SideStore guide at JILAXZONE in case you need a more detailed step by step on how to get app installed via SideStore. If you installed it correctly, you should be able to see LiveContainer app on your home screen.
Step 3) Open LiveContainer app
[This is a one-time setup]
Tap on LiveContainer app from iPhone Home screen to open it.
Step 4) Patch SideStore
[This is a one-time setup]
This is recommended to be done. By patching SideStore, you are enabling LiveContainer to be run without JIT (there are many sideloaded apps that don’t require JIT).
Do the following steps on your iPhone:
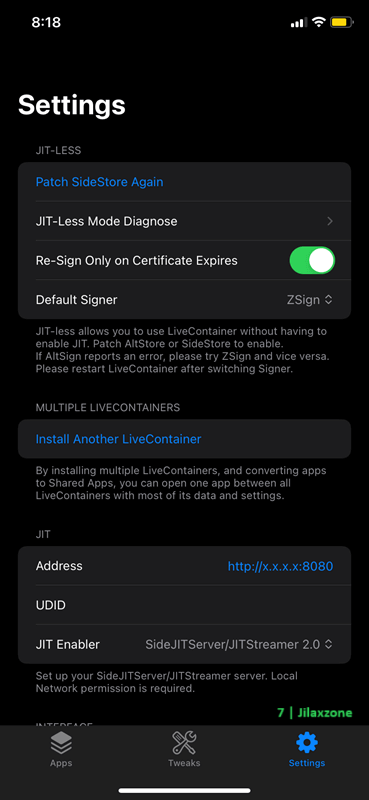
4a) Inside LiveContainer app, tap on “Settings” and find “JIT-LESS” section.
4b) Under “JIT-LESS” section, tap on “Patch SideStore”. LiveContainer will patch and reinstall your SideStore. Do wait until the process completed successfully.
Step 5) to Step 7) are what you need each time you want to run sideloaded app within LiveContainer (repetitive setup)
Step 5) Open LiveContainer app
[This is repetitive setup]
(In case LiveContainer app has not been opened) tap on LiveContainer app from iPhone Home screen to open it.
Step 6) Install & Configure Sideloaded app
[This is repetitive setup]
Do the following steps on your iPhone:
6a) Inside LiveContainer app, navigate to “Apps”.
6b) Tap on “+” and select the ipa file you want to sideload into LiveContainer. Wait until the process finish successfully. Once finished, you should be able to see the entry within LiveContainer.
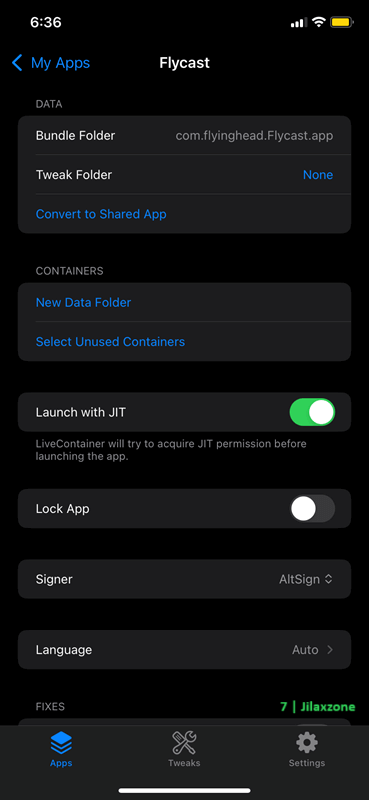
6c) Tap on the sideloaded app and choose “Settings”.
6d) Settings you may want to change:
- Launch with JIT. Enable this if the sideloaded app requires JIT to run.
- Signer. Change the signer in case you are encountering error when running the sideloaded app (if no error, then recommended to keep it as is).
Step 7) Run Sideloaded app
[This is repetitive setup]
Once you have done the necessary configuration to the sideloaded app (such as Launch with JIT) and selecting the Signer, tap “Run” to run the sideloaded app.
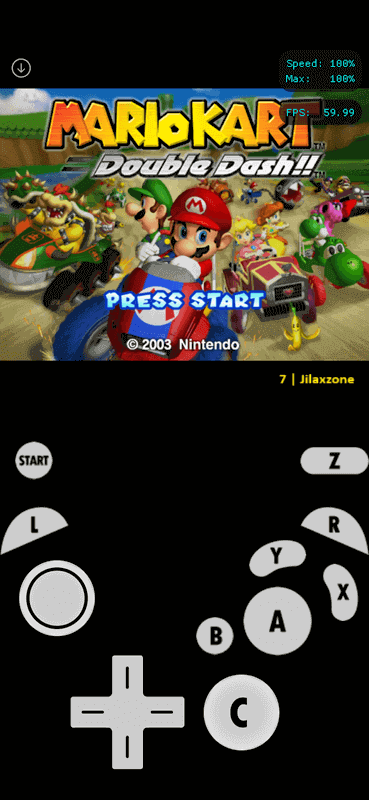
If you have setup the sideloaded app to launch with JIT, you’ll be getting the following screen. This is where you enable the JIT and then go back to LiveContainer app to run the sideloaded app with JIT enabled.

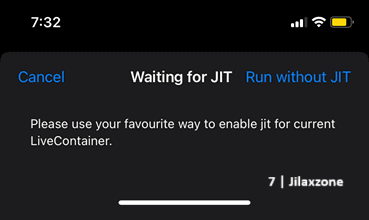
However, if the sideloaded app doesn’t require JIT (you didn’t setup the sideloaded app to launch with JIT), you’ll be redirected directly to the sideloaded app.
Voila, that’s it. Congrats for achieving this far!
List of Sideloaded Apps that are compatible with LiveContainer
Any apps that are NOT in the list you see on the link below, are compatible with LiveContainer.
| Compatibility List | https://github.com/khanhduytran0/LiveContainer/labels/compatibility |
How do you use LiveContainer with JIT
LiveContainer supports many JIT methods, including the recent ones (such as JitStreamer and StikJIT).
My recommendation – as of when this article is written – is to use StikJIT for your JIT needs, however feel free to use whichever JIT method you are comfortable to use. Check out the detailed step by step of installing, configuring and using StikJIT here: Beginner’s guide to use StikJIT – On-device JIT activation at JILAXZONE.
If you are using JitStreamer:
Do the following setup on your iPhone:
a) Open LiveContainer app.
b) Inside LiveContainer, navigate to “Settings”.
c) Under “JIT” section, tap on “JIT Enabler”.
d) Choose “JitStreamer-EB”.
Leave the rest of settings unchanged.
In case you need: Full Detailed Guide to Setup JitStreamer at JILAXZONE.
If you are using StikJit or other JIT method:
Do the following setup on your iPhone:
a) Open LiveContainer app.
b) Inside LiveContainer, navigate to “Settings”.
c) Under “JIT” section, tap on “JIT Enabler”.
d) Choose “SideJITServer/JITStreamer 2.0”.
Leave the rest of settings unchanged.
In case you need: Full detailed guide to Setup StikJIT at JILAXZONE.
Then on the respective sideloaded app, change the following config:
Do these steps in case you haven’t done so
a) Open LiveContainer app.
b) Inside LiveContainer, navigate to “Apps”.
c) Tap on the sideloaded app, and choose “Settings”.
d) Turn on “Launch with JIT”. Enable this if the sideloaded app requires JIT to run.
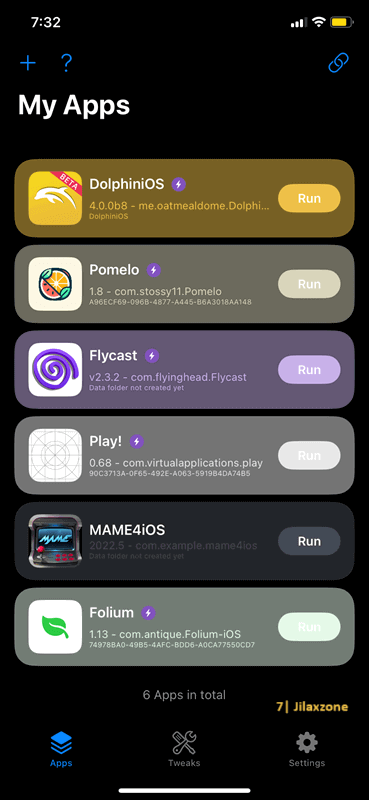
If you setup correctly, you should see “lightning” icon next to the sideloaded app icon, under “Apps” tab.
In case you need some links to get the IPA shown on the screen above:
| System | Emulator available for iOS | Installation guide Link |
|---|---|---|
| Sega Dreamcast | Flycast | Flycast for iOS at JILAXZONE |
| Sony PlayStation 2 | Play! | Play! for iOS at JILAXZONE |
| Nintendo 3DS | Folium (Full FREE version) | Free version of Folium for iOS at JILAXZONE |
| Nintendo GameCube | DolphiniOS | DolphiniOS for iOS at JILAXZONE |
| Nintendo Wii | DolphiniOS | DolphiniOS for iOS at JILAXZONE |
What is best JIT enabler for LiveContainer?
As shared before and as of when this article is written, the best JIT to be used for sideloaded apps within LiveContainer is StikJIT.
Refer to my beginners’ guide to install and configure StikJIT here: Beginner’s guide to use StikJIT – On-device JIT activation, Run VM, play 3DS, PS2, Wii, GameCube, DreamCast at full speed without PC, without Wi-Fi at JILAXZONE.
Bring it all together
With LiveContainer installed and especially combined with the best JIT enabler out there (currently it’s StikJIT), it opens the iPhone and iPad to run something unthinkable before with only free Apple Developer account: Running more than 3 sideloaded apps, running unsigned IPA, all with full speed and no restrictions.
In case you encountered any difficulties and/or have queries, don’t hesitate to put your queries or thoughts on the comment section down below. I’ll be happy to assist.

Controllers Recommendation – Play better with Controller!
Playing retro games is always better with controller!
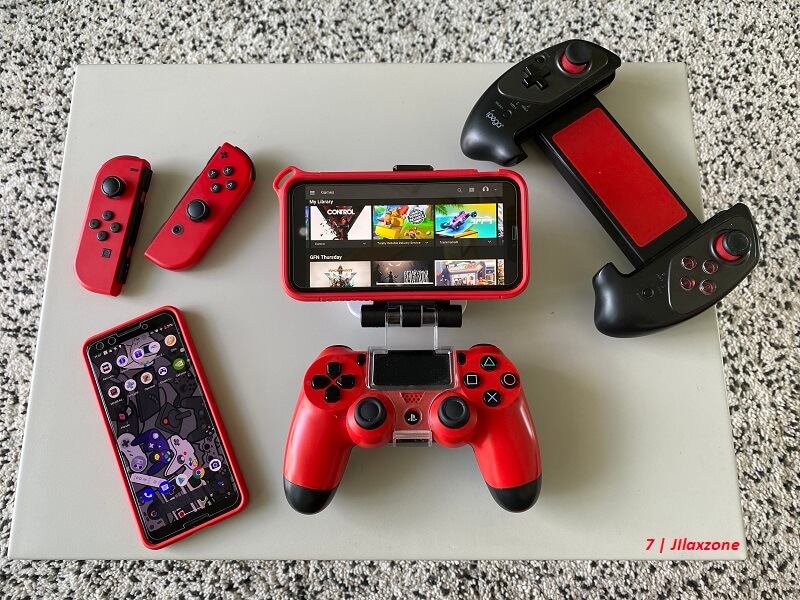
if you are like me, using LiveContainer to sideload multiple retro-game emulators with JIT enabled, while you can always use the touchscreen of the iPhone to play the games, but for greater fun and enjoyment, I would recommend you to play the games with the Controller using physical buttons – so the experience is (almost) the same as the original. Just in case you need recommendation, here they are. I am personally using Nimbus and DualShock 4 to play the games.


All controllers’ images shown below are trademarks of the respective owners.
8BitDo M30 | The Bluetooth controller that looks like the 6-button SEGA Genesis / Mega Drive controller. Get 8BitDo M30 on Amazon Get 8BitDo M30 on AliExpress Get 8BitDo M30 Android/iPhone Clipper on AliExpress |
Backbone Controller 2nd Generation with USB-C / Lightning | The controller that uses USB-C (or lightning) to connect. Very handy and portable to carry around. Get Backbone Controller on Amazon |
Razer Kishi | Best telescopic controller for iPhone. It comes with Lightning connector for passthrough charging as well as better low-latency gaming. In case you need it: Get Razer Kishi for Android on Amazon Get Razer Kishi for Android on AliExpress Get Razer Kishi for iPhone on Amazon Get Razer Kishi for iPhone on AliExpress |
SteelSeries Nimbus+ | For playing iOS games. I like it because it’s MFi certified – Made for iOS, any controller-compatible games will for sure run with this controller. In case you need it: Get SteelSeries Nimbus+ on Amazon Get Nimbus iPhone clipper on AliExpress. |
Xbox Series X|S Wireless Controller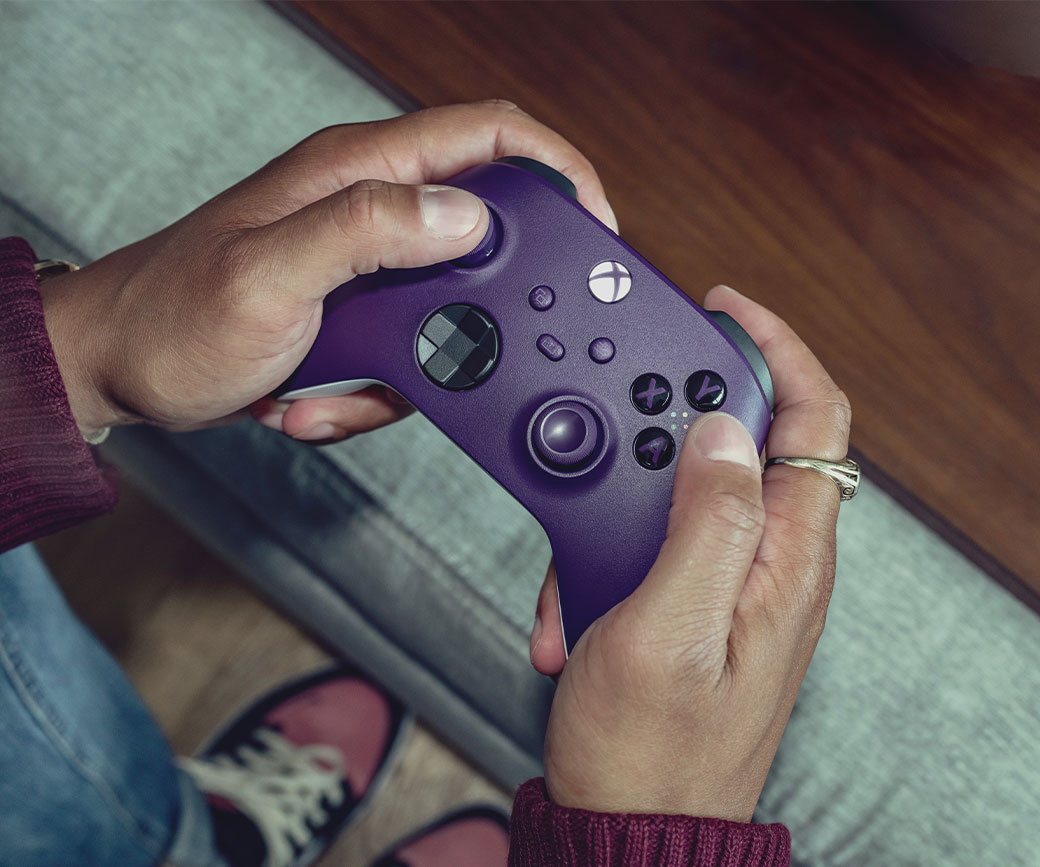 | Great controller from Xbox compatible with your Xbox (of course!) as well as Windows PC, Android and iOS, recommended for those with big hands. Read here for pairing Xbox Series X|S Controller with your iPhone at JILAXZONE. In case you need it: Get Xbox Series X|S Wireless Controller on Amazon Get Xbox Series X|S Android/iPhone Clipper on AliExpress Get Xbox One Controller on Amazon Get Xbox One Controller on AliExpress Get Xbox One Android/iPhone Clipper on AliExpress |
PS5 DualSense | Awesome controller from PlayStation compatible with your PS5 (of course!) as well as Android and iOS, recommended for those with smaller hands. Read here for pairing PS5 DualSense Controller with your iPhone at JILAXZONE. In case you need it: Get PS5 DualSense on Amazon Get PS5 DualSense Android/iPhone Clipper on AliExpress |
PS4 DualShock | While DualSense is the latest PlayStation controller but doesn’t mean DualShock 4 is bad. DualShock 4 is indeed one of the cheaper alternatives to get into gaming on your Android and iOS, recommended for those with smaller hands. In case you need it: Get PS4 DualShock 4 on Amazon Get PS4 DualShock 4 on AliExpress Get PS4 DualShock 4 Android/iPhone Clipper on AliExpress |


Here’s my own setup:

Note: If you buy anything from Amazon / AliExpress using links above, I will earn a small commission at no extra cost charged on your purchases.
Do you have anything you want me to cover on my next article? Write them down on the comment section down below.
Alternatively, find more interesting topics on JILAXZONE:
JILAXZONE – Jon’s Interesting Life & Amazing eXperience ZONE.
Hi, thanks for reading my curated article. Since you are here and if you find this article is good and helping you in anyway, help me to spread the words by sharing this article to your family, friends, acquaintances so the benefits do not just stop at you, they will also get the same goodness and benefit from it.
Or if you wish, you can also buy me a coffee:


Thank you!
Live to Share. Share to Live. This blog is my life-long term project, for me to share my experiences and knowledge to the world which hopefully can be fruitful to those who read them and in the end hoping to become my life-long (passive) income.
My apologies. If you see ads appearing on this site and getting annoyed or disturb by them. As much as I want to share everything for free, unfortunately the domain and hosting used to host all these articles are not free. That’s the reason I need the ads running to offset the cost. While I won’t force you to see the ads, but it will be great and helpful if you are willing to turn off the ad-blocker while seeing this site.