Running Windows on your iPhone and iPad without Jailbreak
If you google around, there are various ways you can do this: installing Windows on iOS device, but I’m writing this article to show you the easiest way – as of today when this article is written – to get Windows running on your iPhone or iPad without the need to jailbreak the device.
Many of you probably ask this, “Why you would want to run a Windows on your iPhone or even iPad?” For me it’s a POC – Proof Of Concept and I’m looking for possibilities where in the near future, you won’t need to carry around laptop with you anymore. Everything is inside your smartphone.
Anyway, regardless of whatever reason that is, here how you can run Windows on iOS.
How to run Windows on iOS (high level)
For those who are adventurous and want to figure out the details themselves, you just need to see this high level outline on steps needed to be done to get Windows up and running on your iOS device.
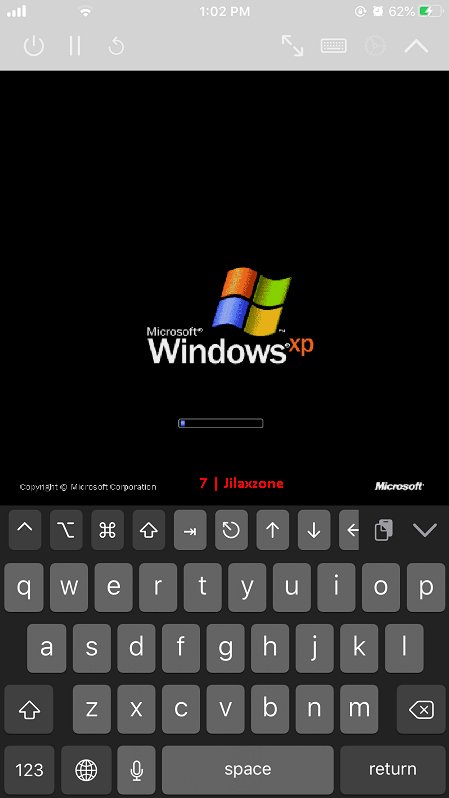
But for the rest who needs to get the detailed steps by steps, jump to the next section.
1) Install UTM
2) Get Windows image
3) Create and configure a new VM
4) Install Windows on the VM
5) Run Windows
Article continues below.
Popular on JILAXZONE today:
Here’s the detailed step by step to get Windows up and running on iOS
On this trial, I’m using and testing:
- Using iPhone 7 Plus, with A10 Fusion and 3GB RAM
- Testing Windows XP SP3 image
Why Windows XP and not newer Windows? It’s because I’m using a 3-4 year old iPhone 7 Plus that only has 3GB RAM out of the box: Apart from iPhone 7 Plus RAM may not be enough to run smoothly for newer Windows, the phone also lacks of processing power – especially if you compare to the Apple A13 (or soon A14).
If you want or even better has newer iPhone or iPad model, you can try with newer version of Windows. There’s nothing to stop you on that. Moreover, the step by step is pretty much similar regardless of the Windows version you are using.
Here you go.
1) Install UTM
UTM is like VMWare or VirtualBox on desktop/computer platform, but built for iOS.
Unlike normal apps that appear and listed on Apple App Store, you won’t find UTM on the Apple App Store – reason behind most likely is because Apple A-series chip (such as A13 Bionic) is not (yet) supporting hardware virtualization and Apple doesn’t project its mobile devices (iPhone and iPad) to run Virtual Machines on it – though I highly optimistic soon enough Apple A-series chip would be able to have hardware virtualization built-in – thanks to Apple recent moves, transitioning its Mac OS from Intel-based to ARM-based OS.
Detailed step by step to download, install UTM, you can find it here: Detailed step by step to install and run UTM.
2) Get Windows image
Get the Windows image in .iso format. You can get Windows image from various kinds of ways. Transfer the .iso Windows image to your iOS device: either via iTunes or download it directly to Files app.
In case you need one and okay to use Windows XP, you can get the Windows XP SP3 iso from Archive.org here: Win XP SP3 Lite.
3) Create and configure a new Windows VM
Once you have UTM installed on your iOS device and get the Windows image on the iOS device (recommended to have it inside Files app), then it’s time to create and configure the new Windows VM.
a) Open UTM app.
b) Create a new Windows VM. On Create VM window, under Name, give the VM a proper name. On my case, Windows XP VM.
c) Select the Architecture. Under System, tap on Architecture and select the proper one. If you are like me, using Windows XP, choose i386 (x86) since most Windows XPs are 32-bit.
d) Select the Type of Computer. Tap System, leave it to default choice.
e) Configure RAM for VM. Tap Memory, give a decent number of memory/RAM. If you are like me, using Windows XP, 256 MB or 512 MB is more than enough. When Microsoft released Windows XP back in 2001, it requires only 64 MB RAM.
f) Configure Drives. Under Drives, tap on “Setup Drives/Images”. Here we are going to create 2 things: 1 is to create a CD/DVD image and another 1 is to create a hard disk image.
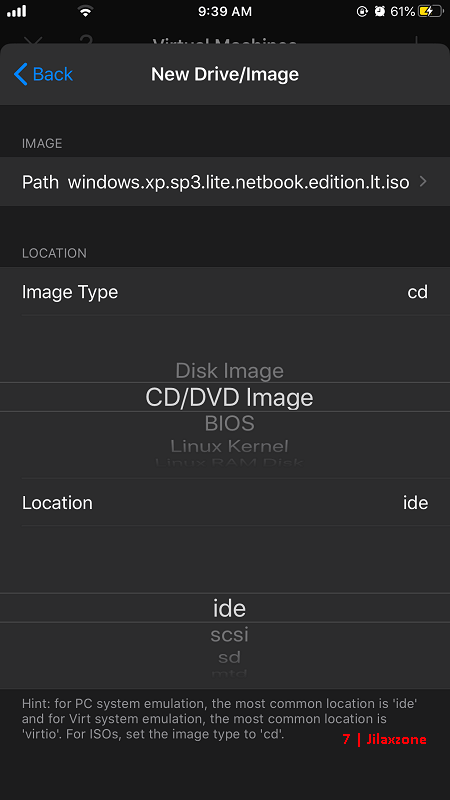
g) Adding Windows image. Under Drives/Image, tap on “+”. Tap on “Path”. Tap on “+” and select “Import”. Select the Windows image. Then tap on the Windows image added. Tap on “Image Type”, select “CD/DVD Image”. Leave the “Location” to default as “ide”. If you are doing it correctly, you should see something similar like image below. Tap “Back” once done. Now you should see the CD/DVD image pointing to your Windows image.
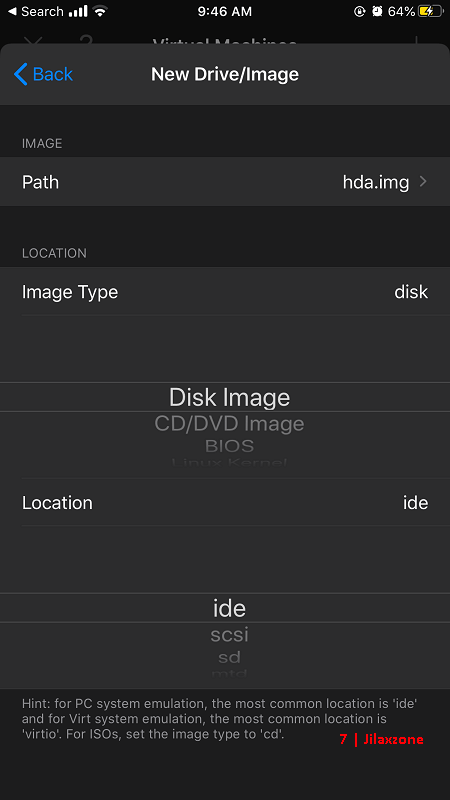
h) Adding Hard Disk image. Under Drive/Image, tap on “+”. Tap on “Path”. Tap on “+”, this time select “Create”. Put the name as “hda.img” (or anything else) and put the size to 2048 MB (if you are using newer version of Windows, recommended to give a higher value, on my case, Windows XP only requires 512 MB of space once installed). Tap “Save” once done, you should see “Creating disk…” message shown. Then tap on “hda.img” to select it. Tap on “Image Type”, select “Disk Image”. Leave the “Location” to default as “ide”. If you are doing it correctly, you should see something similar like image below. Tap “Back” once done. Now you should see the Disk image pointing to hda.img.
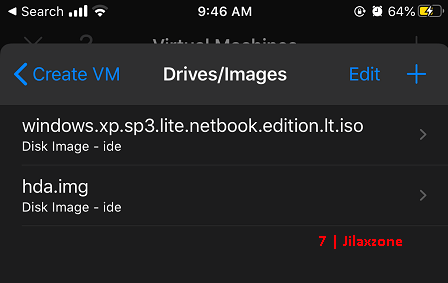
i) Confirm the setup. If you added both Windows image and Hard Disk image properly and correctly, under “Select Image”Drives/Images now you should see both are appearing similar like image below <image>. Tap on “Create VM” to go back to Create VM window.
j) Ready to create the Windows VM. On Create VM window, leave the “Open Configuration after Creation” unchecked, since you can do it later. Tap “Save” to create the VM.
VM Created! Now you should be able to see your newly created VM listed on the UTM Virtual Machines screen. Yay! You’re almost there.
4) Run the VM and Install Windows on the VM
Once the Windows VM is created, all you need to do is to tap on the “Play” button. Tap it and your Windows VM is run!
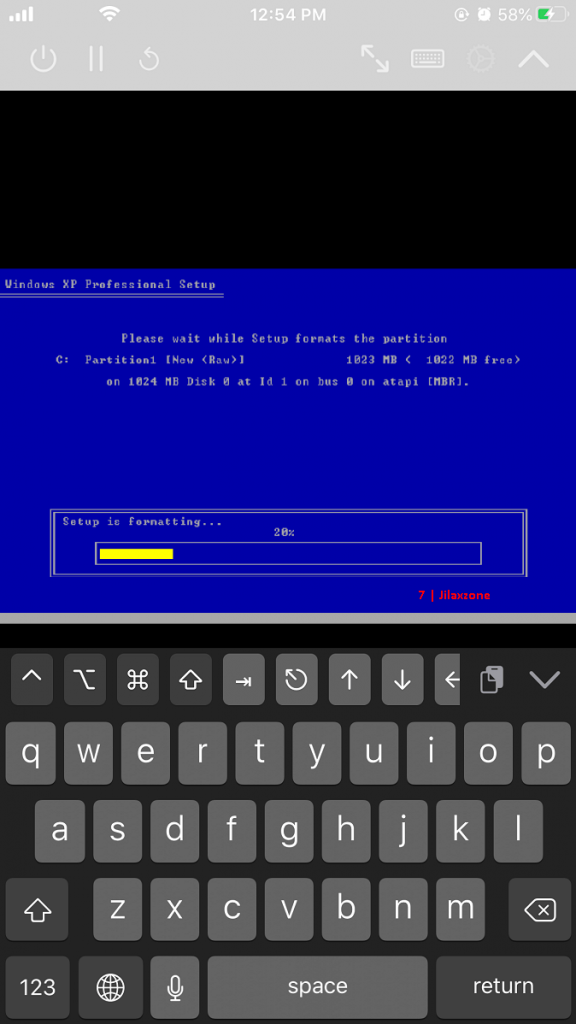
But since you never install it before, you should go with the normal Windows installation procedure. Just follow the steps instructed on the screen.
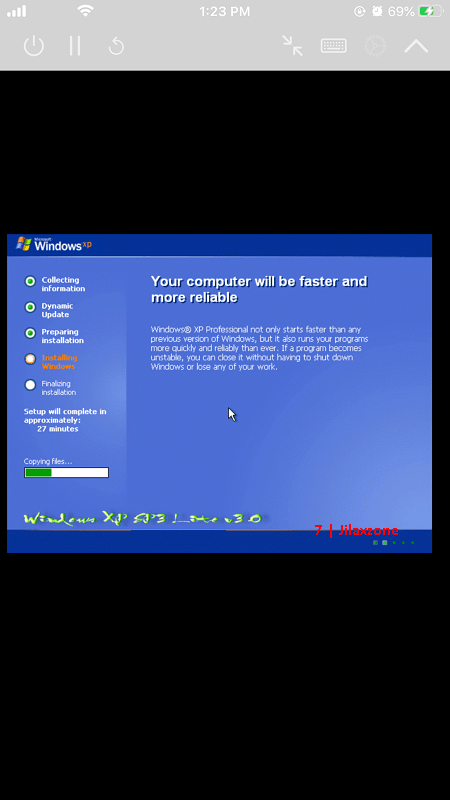
On my case, installing Windows XP SP3 (set with 256 MB RAM) on UTM using my iPhone 7 Plus took me about 45 minutes to complete.
5) Run Windows
After Windows installation process is done, now you can boot and run Windows.
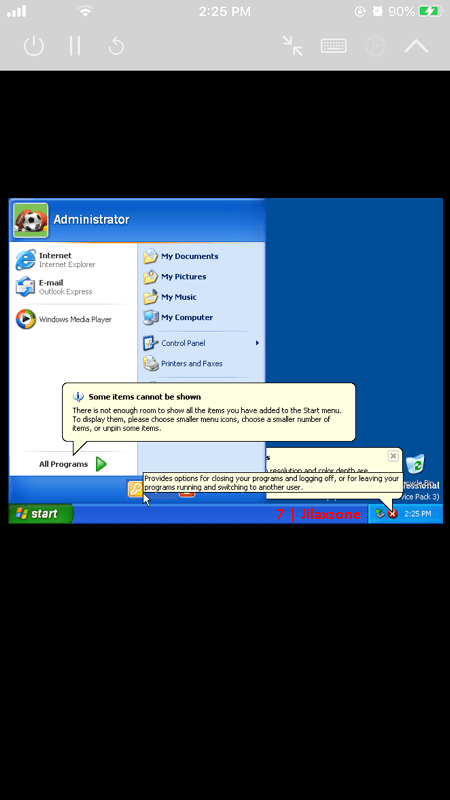
Bring it all together
Unfortunately I didn’t record a video to document to whole process, but I took some screenshots as you can see on all the images above.
And since it took 45 minutes for me to configure the Windows, I haven’t given it a try (I was tired already), will hopefully update here on the Windows performance whether it’s usable/not for daily usage.
Let me know in the comment section below if you have successfully made one for yourself or have issues creating the Windows VM, I’ll be gladly try to help.
Do you have anything you want me to cover on my next article? Write them down on the comment section down below.
Alternatively, find more interesting topics on JILAXZONE:
JILAXZONE – Jon’s Interesting Life & Amazing eXperience ZONE.
Hi, thanks for reading my curated article. Since you are here and if you find this article is good and helping you in anyway, help me to spread the words by sharing this article to your family, friends, acquaintances so the benefits do not just stop at you, they will also get the same goodness and benefit from it.
Or if you wish, you can also buy me a coffee:

Thank you!
Live to Share. Share to Live. This blog is my life-long term project, for me to share my experiences and knowledge to the world which hopefully can be fruitful to those who read them and in the end hoping to become my life-long (passive) income.
My apologies. If you see ads appearing on this site and getting annoyed or disturb by them. As much as I want to share everything for free, unfortunately the domain and hosting used to host all these articles are not free. That’s the reason I need the ads running to offset the cost. While I won’t force you to see the ads, but it will be great and helpful if you are willing to turn off the ad-blocker while seeing this site.



Could you use this method to install Ubuntu, or a newer version of windows?
Hi Chris,
Someone tried to install Windows 7 or Windows 10 on their iPad. So yeah, it’s possible – just ensure you have the latest iPhone (or better latest iPad).