Backup, restore and migrate WordPress website easily
According to Wikipedia, WordPress powers around 60 millions website world-wide. That’s about 34% of the web (read here) and that fact makes WordPress to be the most popular website management system in use. Though many – including you – may relate WordPress to closely relate to blog (or blogging) but in fact, WordPress supports much more than just a blog. WordPress supports blog, simple website, web portals, enterprise websites and even surprisingly applications.
All that facts, make backing-up, restoring and migrating WordPress to be important and crucial pieces of owning a WordPress websites. Since these days, there’s plenty of reasons why you – as the WordPress websites owner – want to know how to do them (backup, restore and migrate): website hacks and ransom, cheaper and/or better hosting alternatives are two of the reasons.
After owning a small WordPress website for about 3 years (and still running) and play around with many plug-ins and ways to do back-up, restore and migrate to a new hosting, I came to know one of the best way to do backup, restore and migrate WordPress website easily.
Meet UpdraftPlus – Backup/Restore plugin for WordPress
Long story short, (you can read the long version here) back in March 2019, my WordPress website was down for days. Later I found out it was because the hosting was too crowded with people, cramming multiple accounts into the same server. Then I found a replacement hosting service – AWS. Issue was, the new hosting service doesn’t have CPanel. Most people used and knew CPanel to backup and restore their websites. That’s when I met with UpdraftPlus.
UpdraftPlus does backup and restore directly on WordPress layer. So it won’t matter whether or not your hosting services are using CPanel or something else, as long as you are moving from WordPress to another WordPress, UpdraftPlus can easily backup existing WordPress and restore them into the new hosting service.
Installing UpdraftPlus
There are 2 versions of UpdraftPlus. The free version and premium version. The one I shared here is the free version. For me personally, using the free version is more than good enough to serve my needs. The premium version, however, does have some great add-ons and even more simplifying the whole back-up and restore process.
The easiest way to install UpdraftPlus is by going to your WordPress admin page.
1) From WordPress admin page, on the left menu, click on Plugins then Add New.
2) On Add Plugins page, head to search bar and type UpdraftPlus.
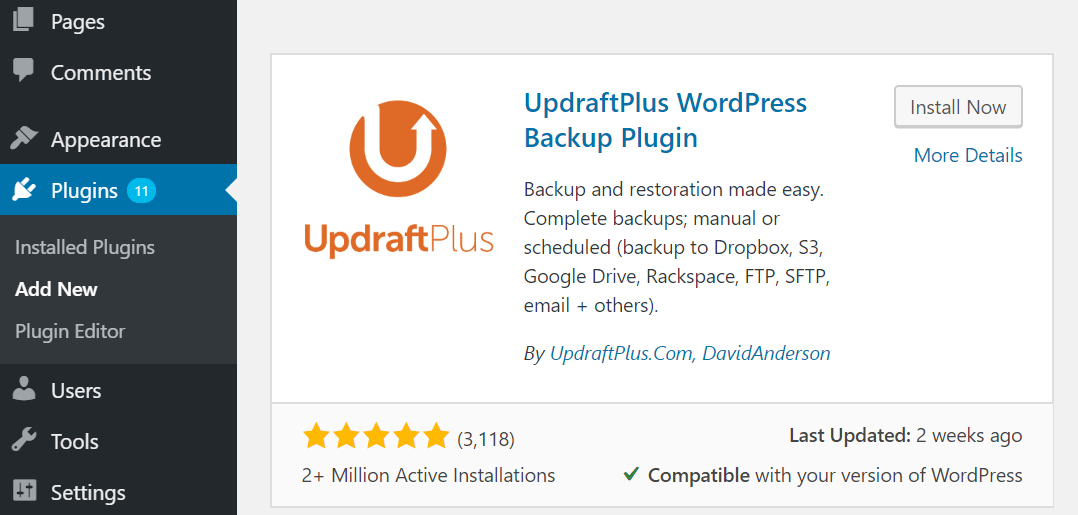
3) Click on Install Now to start installing the plug-in to the WordPress website.
4) Once done installing, to check if the UpdraftPlus is installed correctly, under Settings you should see UpdraftPlus Backups. If you can see it, it means UpdraftPlus has been installed correctly and successfully.
Alternative link to install UpdraftPlus manually, head to the following link: https://wordpress.org/plugins/updraftplus/
Backup WordPress using UpdraftPlus
Once UpdraftPlus is installed, to perform backup of WordPress website, do the following steps.
1) On WordPress admin page, head to Settings then click on UpdraftPlus Backups.
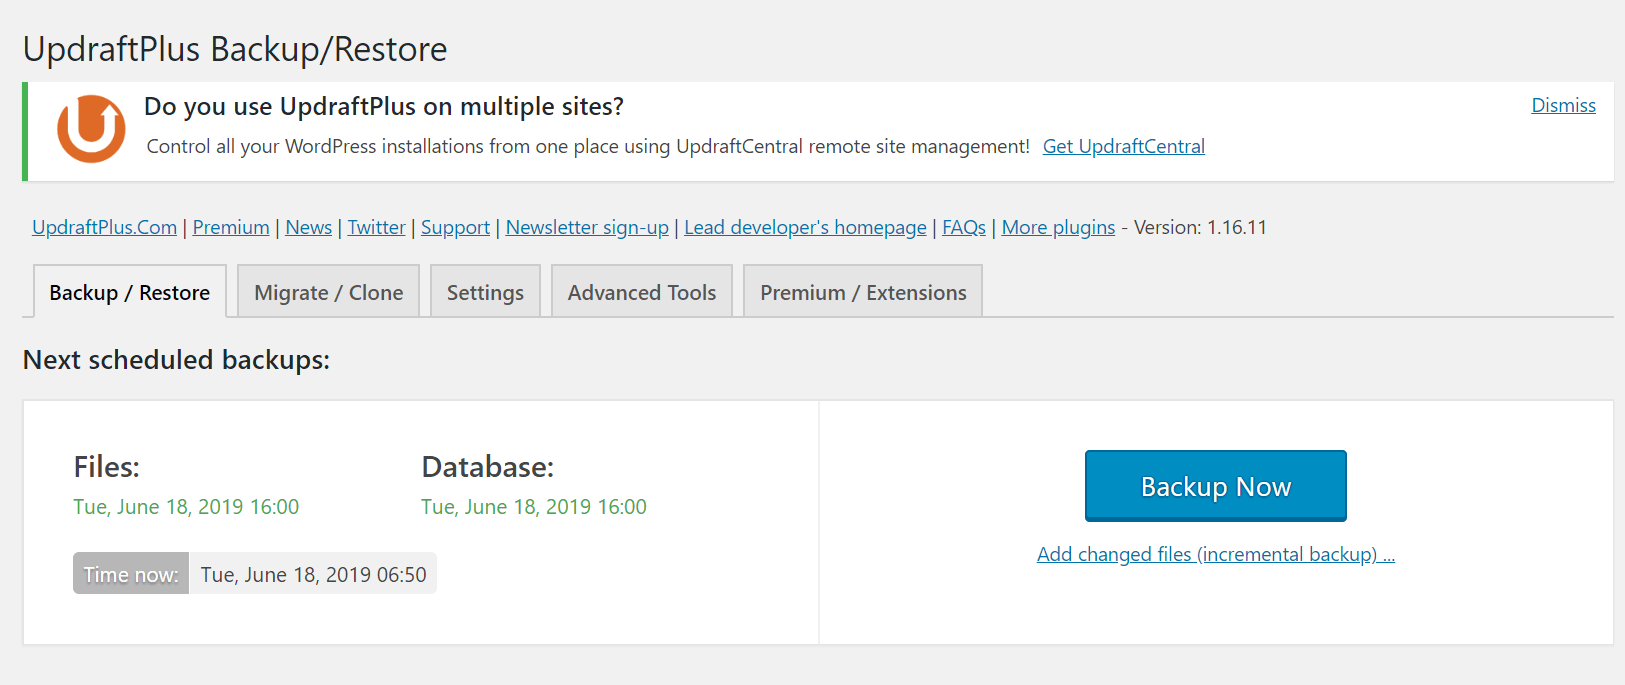
2) On UpdraftPlus Backup/Restore page, head to Backup/Restore tab and click Backup Now.

3) When prompted, tick on both Include your database in the backup and Include your files in the backup. These are the 2 most important things during a backup. Other entries, do tick them if you think you need/are okay with them.
4) Click on Backup Now to start the backup process.
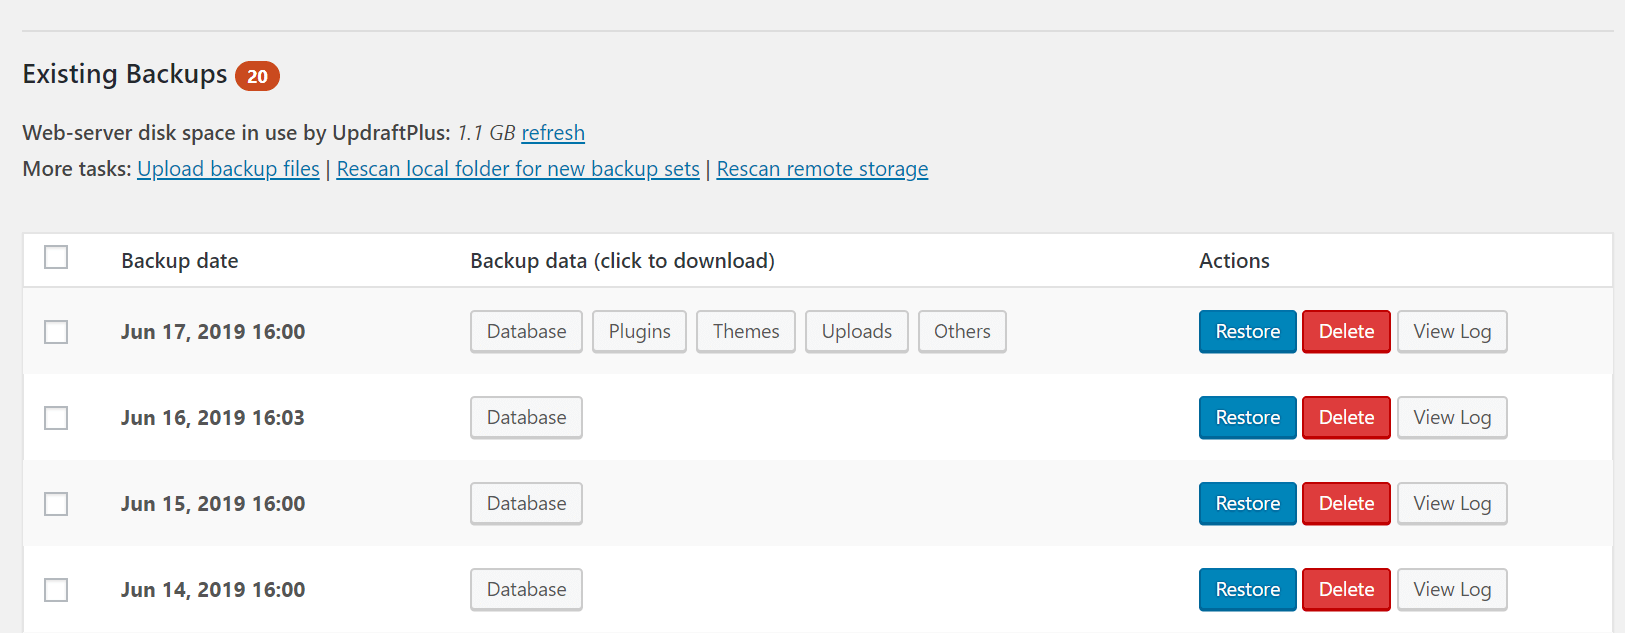
The backup process will take some time, depends on how big and messy your WordPress website is. Once the backup process is done, you’ll see the backup entries under the Backup/Restore tab, Existing backup section.
That’s it for backing up WordPress website.
In case you need to restore these backup files into other hosting service, then click download on each of the items (Database, Plugins, Themes, Uploads and Others). Save them into your local computer folder.
Article continues below.
Popular on JILAXZONE today:
Restore WordPress using UpdraftPlus
If you are restoring your UpdraftPlus backup into another hosting (different hosting with where the backup is taken), make sure to:
- First install WordPress fresh instance
- Then to install UpdraftPlus plugin on the WordPress instance. Follow the steps on installing UpdraftPlus on this article.
- To have and get ready with UpdraftPlus backup files on your local computer folder. To get the files, follow the backup WordPress using UpdraftPlus steps on this article.
To restore WordPress website, do the following steps.
1) On WordPress admin page, head to Settings then click on UpdraftPlus Backups.
2) On UpdraftPlus Backup/Restore page, head to Backup/Restore tab and scroll down until you find Existing Backups section.
3) Under Existing Backups section, click on upload backup files.
4) You can choose to drop backup files on the upload area (if supported), otherwise click on Select Files to start selecting the backup files. Do upload all of the backup files you want to restores (such as
Database, Plugins, Themes, Uploads and Others).
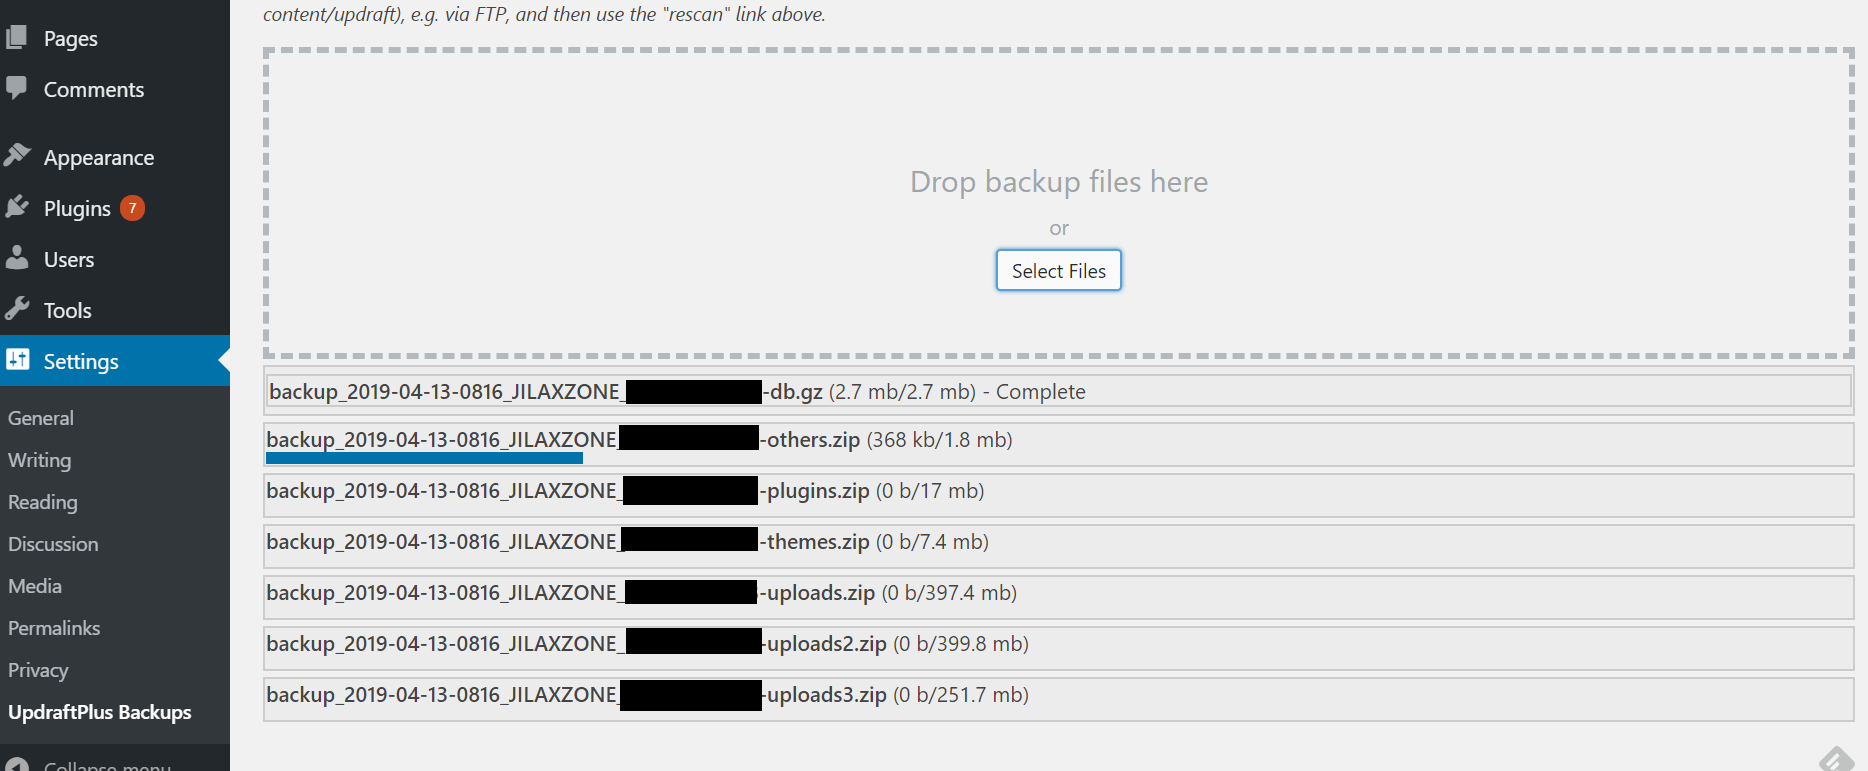
5) Wait for all the upload to finish.
6) Once all upload has been finished and completed, click on Restore button.
7) When prompted, tick on all (Plugins, Themes, Uploads, Others and Database) except WordPress core. Tick also Search and replace site location in the database (migrate) – if you wish to you the same website address. Then click on Restore to begin restoring.
The restore process will take some time, depends on how big the backup files of your WordPress website is. Once the restore process is done, do give sanity check to make sure nothing is left behind, before deleting the old files.
That’s it for restoring a WordPress website via UpdraftPlus.
Bring it all together
From all the backup and restore steps above, you don’t need a coding skills nor you need to ask someone else to help on backing up and restoring WordPress website. UpdraftPlus make it so easy to do it.
If you need recommendation on a good performance and value WordPress website hosting, do check my post here.
Do you have anything you want me to cover on my next article? Write them down on the comment section down below.
Alternatively, find more interesting topics on JILAXZONE:
JILAXZONE – Jon’s Interesting Life & Amazing eXperience ZONE.
Hi, thanks for reading my curated article. Since you are here and if you find this article is good and helping you in anyway, help me to spread the words by sharing this article to your family, friends, acquaintances so the benefits do not just stop at you, they will also get the same goodness and benefit from it.
Or if you wish, you can also buy me a coffee:

Thank you!
Live to Share. Share to Live. This blog is my life-long term project, for me to share my experiences and knowledge to the world which hopefully can be fruitful to those who read them and in the end hoping to become my life-long (passive) income.
My apologies. If you see ads appearing on this site and getting annoyed or disturb by them. As much as I want to share everything for free, unfortunately the domain and hosting used to host all these articles are not free. That’s the reason I need the ads running to offset the cost. While I won’t force you to see the ads, but it will be great and helpful if you are willing to turn off the ad-blocker while seeing this site.