DIY Cloud Services: Here’s how to make your Computer accessible over the Internet (but keep it private for you only)
Wanted to have your own Cloud Storage service or Cloud Gaming service or Windows on the Cloud / Mac on the Cloud? You are on the right place!
Nowadays there are more and more things migrated into the Cloud or natively available in the Cloud. Typically those that are migrated into the Cloud or natively available over the Cloud, they become services, such as Music as a Service – such as Apple Music and Spotify, Video and Movie as a Service – such as Netflix and YouTube, Storage as a Service – such as Google Photos, Microsoft OneDrive or AWS S3, Software as a Service – such as Office 365, even now operating system like Windows is offered as a Service. Without you recognizing, you may even have been using them for quite some time.
While the Cloud technologies all these Cloud service providers are using may be fancy, sophisticated and at the same time complicated, but they (the Cloud technologies) are actually boils down into a very simple formula: Enable the contents, software and / or the machine over the Internet!
Now if you are someone who has a Computer (or spare Computer) with you (be it a Windows PC, Linux or Mac), want to experiment a little bit to see how you can enable services over the Internet (such as movies, music, desktop software and even the Computer OS), here on this article, I’m sharing how you can make your Computer accessible over the Internet. Don’t worry, the steps are fairly simple, no coding nor complicated setup involved, more over, the whatever tools I’m using here is either open source or free and doesn’t involve any form of subscriptions – so you can test them anyhow you like.
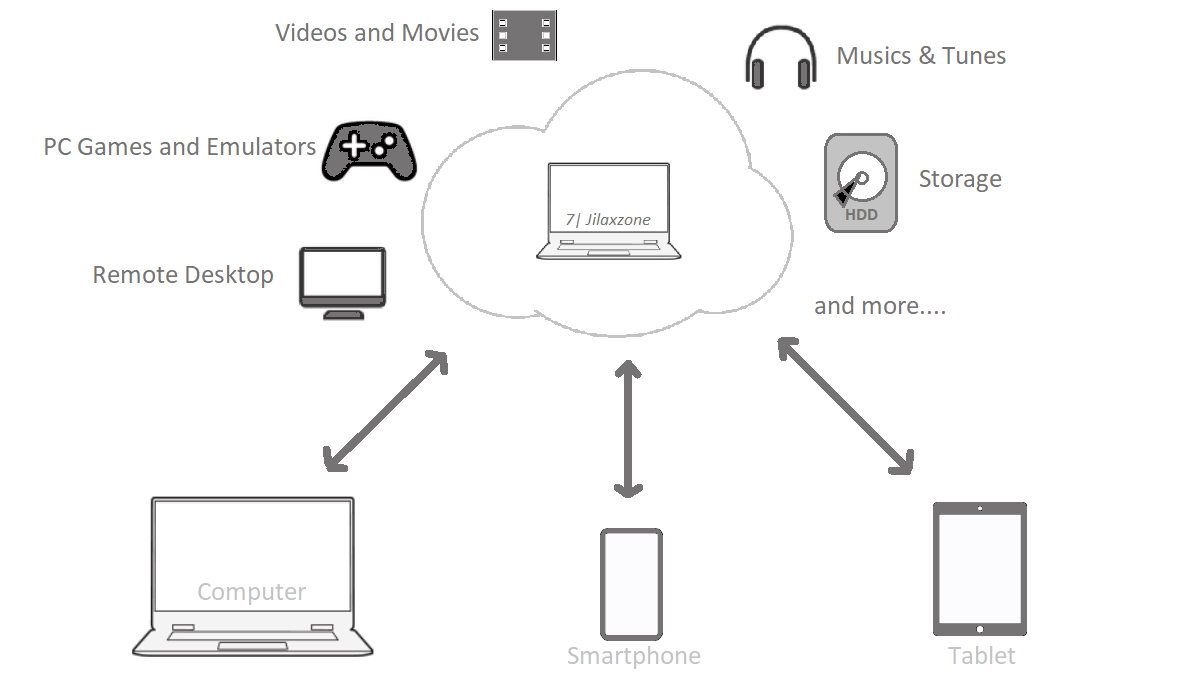
At the end of the steps, you should be able to connect to your Computer over the Internet, which then enables you to do Remote Desktop over the Internet (PC as a Service), play PC games and emulator over the Internet (Cloud Gaming), streaming videos, movies and music from your own storage over the Internet, store files directly to your Computer from anywhere (Cloud Storage) and many more.
- This article shared the detailed steps how you can setup & configure your Computer to be accessible over the Internet so that you can use it from just about anywhere.
- In case you have queries, post them on the comment section below.
- For other interesting articles, head to: DIY Cloud Services, Android, iOS, Emulator, Games and Gaming, Tech, FREE Games and Stuffs and more on JILAXZONE.
- If you find this article / content inside is already obsolete, do let me know by commenting on the comment section below so that I can update the article to reflect the latest process/news. Thanks.
Enabling your Computer over the Internet
In summary, this guide covers the following topic. They have to be done in sequence as shown below.
A) PREREQUISITES – Contains things you need to prepare.
B) INITIAL SETUP – Contains the initial setup to be done.
C) PER-DEVICE SETUP – Show to setup on each of devices you have
D) FINAL SETUP – Show the rest configuration to make your Computer accessible over the Internet.
While the steps look complicated, actually they are not. They are lengthy because I wrote them to be as clear as possible, so anyone – even one without IT knowledge – can do the steps.
| Disclaimer: The guide contains step by step to connect your devices – Computer and mobile device – to the Internet and over the Internet. Connecting your device(s) to the Internet via 3rd party software / solutions carries potentially huge risks, such as data leaking, getting infected by malware or ransomware causing data loss. While I have personally tested all the steps mentioned in this guide and for my case they are working great, but this guide is provided as-is. I won’t be held responsible should any bad things occurred / happened to you / your devices. Proceed using the guide at your OWN RISK! |
PREREQUISITES
Here are the ingredients required. If there are certain things you don’t have / don’t know yet, don’t worry, as part of the setup and configuration steps, all the download links and how to create / configured them are shared in details.
| # | Item required | Description |
|---|---|---|
| a | Computer as Host PC | The main show. You can use Windows, Linux or Mac Computer. |
| b | Internet Connection | To connect your Host PC to the Internet |
| c | Wordwide LAN software or service | To setup a VPN (Virtual Private Network) or SD-WAN (Software-Defined Wide Area Network). On this article, I’m using ZeroTier (more details below). |
| d | Client Device | Any devices, either a Computer, a Smartphone or a Tablet that has Internet connection to connect to your Host PC |
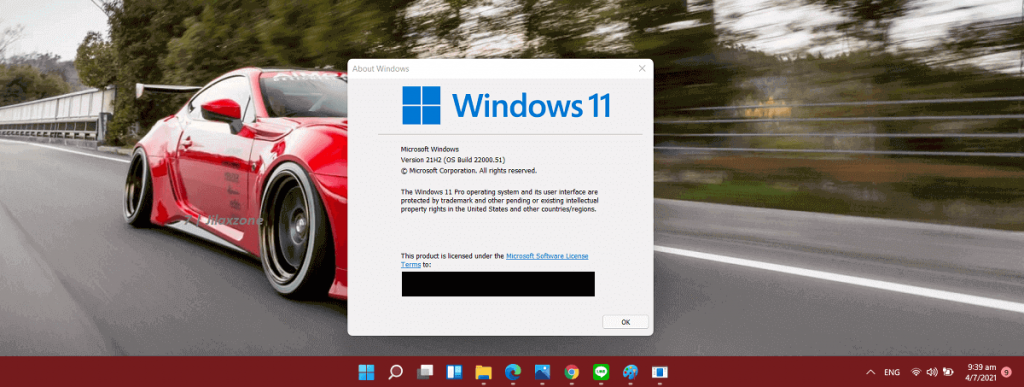
| The steps written here are tested on: a) Host PC using Latest Windows – at the time this article is written is Windows 11 Pro Preview Build 22000.100 co_release. In you are also using Windows and would like to install Windows 11, check the link here to get them installed: Getting Windows 11 and installing on your Computer at JILAXZONE. b) Host PC is a Windows laptop CPU: Intel Core i5-8350U 1.7GHz GPU: Intel UHD Graphics 620 RAM: 8GB c) Wi-Fi Router that runs on 5GHz band. d) Client devices using Android and iOS device. Android device used in the test is Google Pixel 3 running Android 11. iOS device used in the test is iPhone XR running iOS 15 Public Beta 8. In case you are not on iOS 15 or iPadOS 15 yet, check the link here to get iOS 15 & iPadOS 15: Here’s how to update iPhone to iOS 15 today (iPad and iPod Touch included!) at JILAXZONE. Should you are using different version of Android, iOS or iPadOS and / or different computer OS, the steps may be slightly different but should not deviate too much. Anyway, in case you have questions / issues, feel free to put them down on the comment section down below, I’ll be more than happy to help you. |
INITIAL SETUP
Step 1) Setup Worldwide LAN
I have been looking for a software or a service that can enable my Computers and devices over the Internet just like they are on the same room. After rounds of digging here and there, testing a few software and services, I finally discovered ZeroTier, tested it and considered it to be the (one of the) best.
A short introduction, ZeroTier is both the company and the service name, it that provides peer-to-peer network services. This is like creating a VPN or SD-WAN (Software Defined Wide Area Network) over the Internet or in ZeroTier term is Global Area Network, but I prefer to use my own terminology instead: Worldwide LAN (read: make worldwide as your Local Area Network). What makes me recommending this to you is that, the service is easy to setup, no complicated configurations and the best is that the company has the free-tier which is good enough to be used on our setup here. In case you have your own preferred peer-to-peer network service, VPN, SD-WAN or whatever you called them, you can use yours – the rest of the guide is just to showcase you, how you can achieve this: Enable your Computer over the Internet.
| For avoidance of doubts, this is not a sponsored post by ZeroTier nor by anyone else. I wrote this as a happy ZeroTier free-tier customer and shared this to you, so you can also get the knowledge / benefits. |
The following steps are to be done on your Host PC.
Step 1a) Open ZeroTier on your host PC browser. Here’s the link: https://my.zerotier.com/login.
Step 1b) Register a ZeroTier account by clicking “Sign Up”. Fill in your First & Last Name, email and password and click on “Register” to confirm your account registration. An email shall be dispatched to your email. Skip this step in case you have existing ZeroTier account.
Step 1c) Verify email sent by ZeroTier by opening your email account and click on the link provided.
Step 1d) Once verified, login to ZeroTier in case you are not automatically logged in.
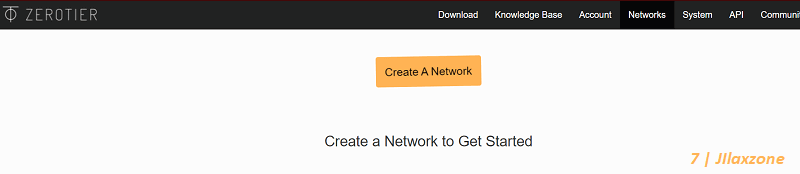
Step 1e) On your host PC, use the following link to create a ZeroTier network: https://my.zerotier.com/network. This network is going to connect your host PC with any of your client devices – be it another Computer running Windows, Linux or Mac, or mobile devices running on Android or iOS.
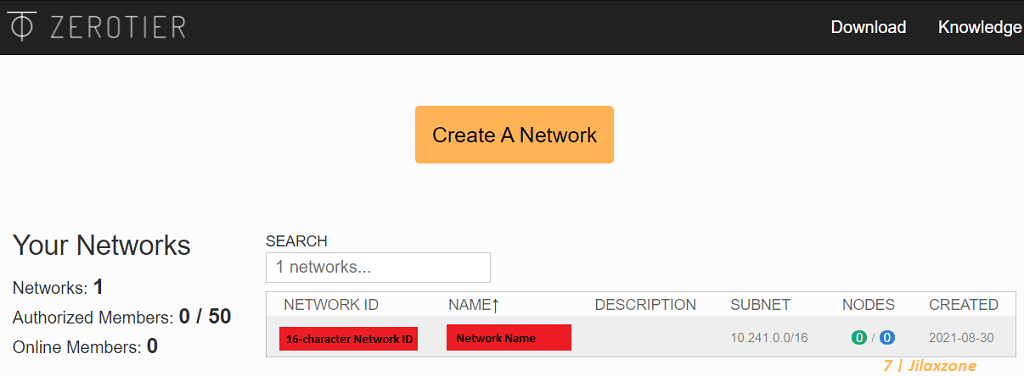
Step 1g) Still on ZeroTier Network page, click on the just created network (click on the random Network NAME). Inside the network page, rename the name as you like, for my case, I named it as “Zero Shift” – inspired from PlayStation game: Zone of The Enders’ Jehuty specialty where she can shift places in no time – which is the same thing we are going to do here: zero shifting network package, so even though host PC and client devices are not connected to the same network, but it’s like they are on the same network – thus zero shift. Then do the following setup:
- Under “Access Control” section, set as “Private”.
- Under “IPv4 Auto-Assign” section tick “Auto-Assign from Range” and click on “Easy”. Then choose the first IP address “10.147.17.*” (you can choose any IP addresses, but for the sake of easiness, let’s just choose the first IP address).
- Under “IPv6 Auto-Assign” section, untick all checkboxes.
- Leave the rest as they are.
- Go back to the very top of the page, find “Network ID” then copy / take note of the 16-character Network ID.
Step 2) Install Worldwide LAN software on the Host PC
After doing the initial setup to create the Worldwide LAN network using ZeroTier, now it’s time to install the Worldwide LAN software from ZeroTier, called ZeroTier One.
The following steps are to be done on your Host PC.
Step 2a) Go to ZeroTier download page. Here’s the link: https://www.zerotier.com/download/.
Step 2b) Under ZeroTier Download page, find “MICROSOFT WINDOWS” (if you are using different OS, then pick accordingly) and click on MSI Installer (x86/x64). You’ll be downloading ZeroTier One.msi.
Step 2c) Once ZeroTier One.msi has been successfully downloaded to your Host PC, go the folder where the ZeroTier One.msi is located, then double click on ZeroTier One.msi to start the installation. When prompted by the Windows User Account Control (if you are using Windows), click “Yes” to continue with the installation. Wait for the installation process to complete.
Step 2d) Once ZeroTier One has been successfully installed on your Host PC, you’ll get a message “ZeroTier has been successfully installed”. Click “OK”.
Step 3) Setup Worldwide LAN software on the Host PC
The following steps are to be done on your Host PC.
Step 3a) On your Host PC, open ZeroTier One app by clicking on the Windows button and type then click on “ZeroTier One”. When prompted by Windows User Access Control (if you are using Windows), click “OK” to start ZeroTier One app.
Step 3b) ZeroTier One app will reside on your Windows taskbar. Go to your Windows task bar, find “ZeroTier One” app (yellow icon). Do right click on ZeroTier One app and click “Join Network”.
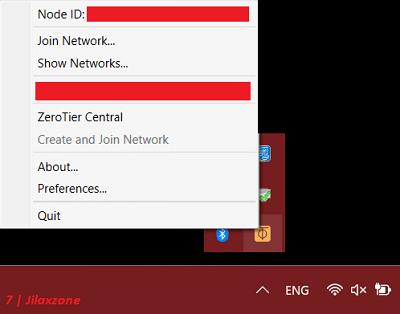
Step 3c) On the “Join a Network” window, type on the textbox the 16-character Network ID that you get from previous step (refer to Step 1 above) and click “Join”. The “Join a Network” window will be disappeared once you clicked the “Join” button.
Step 3d) Back to your Windows task bar, find “ZeroTier One” app (yellow icon). Do right click on ZeroTier One app and click “Show Network”. If you did the steps correctly, you should be able to see the 16-character Network ID inside the “Show Network” window.
That’s it for the initial setup of our Worldwide LAN. Now continue to setup on each of your client devices.
Article continues below.
Popular on JILAXZONE today:
PER-DEVICE SETUP – to be done on each of your Client device(s).
Step 4) Install Worldwide LAN software on the client device
The following step is to be done on your client device – be it a Computer running Windows, Linux or Mac, or mobile device running Android or iOS.
Use the link below to download and install ZeroTier One app.
| Apple App Store download link | ZeroTier One for iOS |
| Google Play Store download link | ZeroTier One for Android |
| Windows, Linux, Mac | ZeroTier One for Computer |
Step 5) Setup Worldwide LAN software on the client device
If your client device is Android or iOS device. Do the following steps:
Step 5a) Once ZeroTier One app installed on your Android or iOS device, run the ZeroTier One app.
Step 5b) Click “+”, under “NETWORK ID”, key in the 16-character Network ID you get from the previous step (refer to Step 1 above) then click “Add Network”.
Step 5c) Once network is added, Turn the ZeroTier Network ON by toggling the switch to ON position.
Step 5d) When prompted “Connection request, ZeroTier One wants to set up a VPN connection that allows it to monitor network traffic. Only accept if you trust the source”, click “OK” and in case you get prompted to key in your passcode, key in your passcode. This will install VPN on your Android or iOS device.
If your client device is Computer running Windows, Linux or Mac. Do the following steps: (Steps provided is tested on Windows machine).
Step 5e) On your client PC, once ZeroTier One app is installed, open ZeroTier One app by clicking on the Windows button and type then click on “ZeroTier One”. When prompted by Windows User Access Control (if you are using Windows), click “OK” to start ZeroTier One app.
Step 5f) ZeroTier One app will reside on your Windows taskbar. Go to your Windows task bar, find “ZeroTier One” app (yellow icon). Do right click on ZeroTier One app and click “Join Network”.
Step 5g) On the “Join a Network” window, type on the textbox the 16-character Network ID that you get from previous step (refer to Step 1 above) and click “Join”. The “Join a Network” window will be disappeared once you clicked the “Join” button.
Step 5h) Back to your Windows task bar, find “ZeroTier One” app (yellow icon). Do right click on ZeroTier One app and click “Show Network”. If you did the steps correctly, you should be able to see the 16-character Network ID inside the “Show Network” window.
FINAL SETUP
Step 6) Complete Worldwide LAN setup
After doing previous steps (Step 1 to Step 5), both your Host PC and Client device(s) (Computer, Android or iOS) have both connected to the same 16-character Network ID. Now do these final steps to activate the connection.
The following steps are to be done on your Host PC.
Step 6a) Open ZeroTier Network page on your Host PC browser. Here’s the link: https://my.zerotier.com/network/. When prompted to login, key in your ZeroTier account and password.
Step 6b) Inside ZeroTier Network page, click on the Network you have created, then go to “Members” section.
Step 6c) Under “Members” section and inside the table, you should see at least 2 addresses: one is your Host PC and the other one is your client device(s) (another Computer or Android or iOS device). If you connect more than 1 client device, then you should see more than 2 addresses. Under the Name/Description, label them properly so that going forward, it will be easier for you to identify which one is which.
Step 6d) Then on the all addresses, go to the “Auth?” column, then tick all the addresses to authenticate them. This process is acknowledging that those Host PC and client device(s) are your devices and so that they can connect one to another.
Step 6e) Once you have authenticate them (“Auth?” column is ticked), a Managed IP is assigned to each of them: one Managed IP for your Host PC, another Managed IP for each of your client device(s). Take note of these Managed IPs since you are going to use them. If you can’t directly see the Managed IP, don’t worry as for some device, it’ll take longer to get the Managed IP.
Step 7) Set Worldwide LAN as Private Network on Host PC
This is to set the Worldwide LAN (in this case – ZeroTier) as a Private network. Setting it as Private network will save you from many headaches. You won’t need to configure your Firewall and you can pretty straight-away connect and use your Host PC features (such as SMB or Remote Desktop) without any errors.
Step 7a) open Windows PowerShell, by clicking on Windows button and type “Windows PowerShell”. On Windows PowerShell app, do right click and “Run as Administrator”. When prompted by Windows User Access Control (if you are using Windows), click “OK” to start Windows PowerShell app in Administrator mode.
Step 7b) Key in the following syntax but without the quotes: ‘Get-NetConnectionProfile’, then press Enter. You should see all the available network connection, including the one from ZeroTier. Check if ZeroTier NetworkCategory is Private.
Step 7c) If ZeroTier NetworkCategory is not listed as “Private”, then take note of the Name.
Step 7d) Using the Name, key in the following syntax but without the quotes (leave the double quotes): ‘Set-NetConnectionProfile -Name “<Name>” -NetworkCategory Private’. Replace <Name> with the ZeroTier network Name you get from previous step, then press Enter.
Step 7e) Let’s recheck the ZeroTier NetworkCategory, by keying in the following syntax but without the quotes: ‘Get-NetConnectionProfile’, then press Enter. Check ZeroTier network. This time, you should see ZeroTier NetworkCategory is Private.
Step 8) Connect your client device to Host PC
After doing the previous steps successfully, you have just managed to configure your Host PC to be in the same network as your client device(s) over the Internet – so it’s like a LAN connected device but with a worldwide coverage. Now to test whether it’s working as expected (LAN with worldwide coverage), do the following steps.
The following step is to be done on your client device.
If your client device is Android or iOS device:
Step 8a) Turn OFF Wi-Fi on your Android or iOS device. Let your Android or iOS device to connect to the Internet via 4G LTE or 5G connection.
If your client device is a Computer:
Step 8b) Using your mobile device, turn on Hotspot. Then on your client Computer, switch Wi-Fi to connect to the mobile device hotspot.
The following step is to be done on your Host PC.
Step 8c) Using the list of Managed IPs, you get from previous step (refer to Step 6 above), open Command Prompt, by clicking on Windows button and type then click on “Command Prompt”.
Step 8d) Type in “ping <IP Address>”. Replace <IP Address> with each of the Managed IPs. If your ping returns OK, that means your Host PC and Client device(s) are connected successfully over the Internet.
Bring it all together
With all the steps done, you have just successfully enabled your Computer over the Internet. Now you have Windows on the Cloud (or Linux on the Cloud or Mac on the Cloud) and you can easily access and connect to your Host PC from about anywhere in the world, as long as you have Internet connection! What better is that, you don’t need to pay monthly subscription for it.
While this is the end of this guide, but it’s just the beginning of hours of endless possibilities and fun you are going to get. Your Cloud services empire has just started! I’ll be posting more articles in the coming future that take advantages of this “DIY Cloud Services”, so stay tuned.
In case you encountered any difficulties on any of the setup steps above, don’t hesitate to write me down your queries on the comment section down below, I’ll be happy to help and assist!
Do you have anything you want me to cover on my next article? Write them down on the comment section down below.
Alternatively, find more interesting topics on JILAXZONE:
JILAXZONE – Jon’s Interesting Life & Amazing eXperience ZONE.
Hi, thanks for reading my curated article. Since you are here and if you find this article is good and helping you in anyway, help me to spread the words by sharing this article to your family, friends, acquaintances so the benefits do not just stop at you, they will also get the same goodness and benefit from it.
Or if you wish, you can also buy me a coffee:

Thank you!
Live to Share. Share to Live. This blog is my life-long term project, for me to share my experiences and knowledge to the world which hopefully can be fruitful to those who read them and in the end hoping to become my life-long (passive) income.
My apologies. If you see ads appearing on this site and getting annoyed or disturb by them. As much as I want to share everything for free, unfortunately the domain and hosting used to host all these articles are not free. That’s the reason I need the ads running to offset the cost. While I won’t force you to see the ads, but it will be great and helpful if you are willing to turn off the ad-blocker while seeing this site.