Here’s how to turn your smartphone into Steam Deck & Play any PC games on it | Best Valve’s Steam Deck Alternative
Because why not?
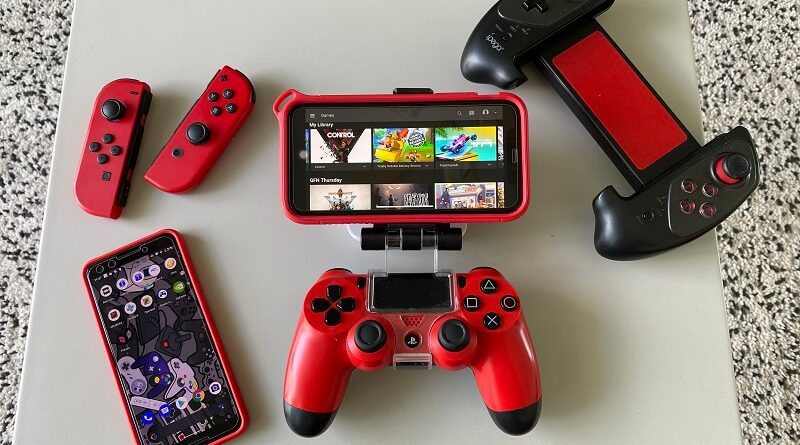
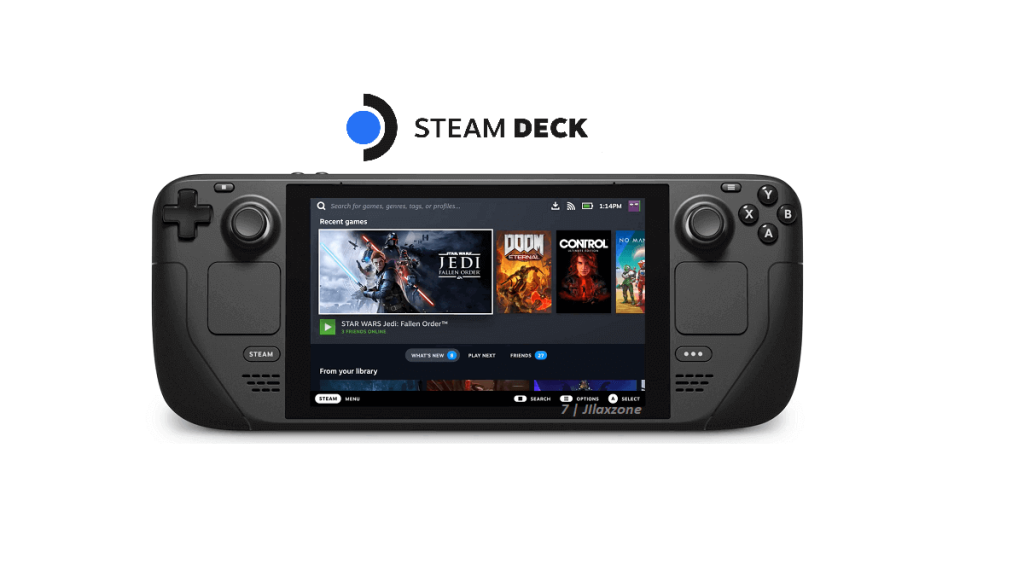
Steam Deck is one of the hottest gadget in the market right now, not only it appeals to PC gamers but also to console gamers as well. So many articles, forums and reddit threads discuss on Steam Deck’s form factor, features and how great the Steam Deck potential is – even JILAXZONE has Steam Deck covered in full Q&A here: Valve’s Steam Deck all questions answered at JILAXZONE. Regardless of being the hottest item today (and likely for few years in the coming future), some of you, due to various reasons, may not get / do not want to get Steam Deck – regardless on how appealing the gadget is. That’s the main reason I’m writing this article – sharing to you and people who can’t get Steam Deck or doesn’t want to get Steam Deck, but considering the Steam Deck portability and all of its goodness – by turning your own smartphone into Steam Deck and play any PC games on it.
- This article shares the steps to turn your smartphone (Android or iOS) into Steam Deck alternative and play any PC games on it.
- No jailbreak, no rooting nor soldering skill nor programming skill is required.
- For other interesting articles related to gaming, check it out here Steam Deck, Xbox, PS5, Nintendo Switch, other gaming, Android Tips and Tricks, iOS Tips and Tricks, Tech or more at JILAXZONE.
- If you find this article / content inside is already obsolete, do let me know by commenting on the comment section below so that I can update the article to reflect the latest process/news. Thanks.
Why you even want to consider doing this?
These are the most likely answer on why you want to consider turning your smartphone into Steam Deck to be able playing any PC games on it. Which one is yours?
1) You don’t get Steam Deck or at least you are not the first batch of group who are getting Steam Deck.
2) Even if you have the money and would like to order/reserve, your country of living is not part countries available to reserve/order Steam Deck.
3) You already have a good gaming laptop/PC or at least a decent laptop/PC and doesn’t want to spend more, but actively looking for a more portable way of playing games like what Steam Deck here is offering.
4) You want something lighter, smaller than Steam Deck (Steam Deck is bulky and heavy!).
5) You want a gaming device that’s accessible anywhere as long as you are connected to the Internet (Steam Deck is Wi-Fi only gaming device).
6) You are simply curious and / or want to experiment and seek for (better, cheaper) alternative.
Whatever your reasons is, check out the methods below on how you can turn your smartphone into Steam Deck alternative and play PC games from it.
What are the methods available – turning your smartphone into Steam Deck and play PC games on it?
There are various methods you can achieve this, but here are the main 2 methods I’m sharing here – both can get you to play PC games on the go.
Method 1: The easiest way
| Pros | Cons |
|---|---|
| + Compatible with Android and iOS. + Very easy to do. In fact it requires 5-10 minutes to setup and get the game running. | – Requires monthly subscription costs. – Not all countries / locations able to do this method, due to service availability. |
Method #1 – the easiest way is by subscribing to Cloud Gaming Service. This method is highly suitable for you who doesn’t have a decent computer to do gaming and for you who doesn’t mind paying a monthly recurring subscription fees. However, in order to use this method, you need to live in a country / location where Cloud Gaming services are available. Some of the available Cloud Gaming Services are Amazon Luna, Google Stadia, NVidia GeForce Now, Shadow Cloud Gaming. Try checking their availability by googling using the following keyword “GeForce Now <your_country>” or “Stadia <your_country>”. If you can find an entry on Google, then likely your country / location is supported by any of these Cloud Gaming Service providers.
Steps required to use Cloud Gaming Services
In case you live in a country / location that supports cloud gaming services, here’s what you can do (requires 5-10 minutes only to start playing PC games on your smartphone).
Step 1) Register on Cloud Gaming Service provider
There are other Cloud Gaming Service providers, but these are 4 most popular ones to get you started. Use the link given below to register your account.
| Provider | Link to register |
|---|---|
| Amazon Luna | https://www.amazon.com/luna/landing-page |
| Google Stadia | https://stadia.google.com/ |
| NVidia GeForce Now | https://www.nvidia.com/en-us/geforce-now/games/ |
| Shadow Cloud Gaming | https://shop.shadow.tech/usen/plans |
Step 2) Download the app on your Smartphone
Once you managed to registered, then you can use the following link given below, to download the app or link to use the services.
| Provider | Link to register |
|---|---|
| Amazon Luna | Amazon Luna for Android Amazon Luna for iOS |
| Google Stadia | Google Stadia for Android Google Stadia for IOS |
| NVidia GeForce Now | NVidia GeForce Now for Android Nvidia GeForce Now for iOS |
| Shadow Cloud Gaming | Shadow Cloud Gaming for Android Shadow Cloud Gaming for iOS |
Step 3) Starting Playing the games
Once you have managed downloaded and installed the Cloud Gaming Services app on your smartphone, then you just need to tap open the app, and start playing the games. Different cloud gaming service providers has different way of getting games into the service. Some of the providers allow you to bring along your existing games while other providers will ask you to buy the games on their platforms. So choose which one is the most suitable for your case.
So that’s it. That’s Method #1 – The Easiest way to turn your smartphone into Steam Deck alternative and play any PC games on it. Now if you are interested in more DIY approach, have a look at method #2 below.
Method 2: The DIY-way
| Pros | Cons |
|---|---|
| + Compatible with Android and iOS. + No monthly recurring subscription costs. + No location restriction (all countries / locations able to use this method). | – Requires a computer to be your Host for your DIY Cloud Gaming service. – Requires 30-40 minutes to complete the full setup and additional time to install and configure the game. |
Method #2 – the DIY-way is by building your own Cloud Gaming Service. Don’t worry, it doesn’t require any soldering skills nor any programming skills. On this method #2, I’m sharing how you can build your own Cloud Gaming Service and make Steam As A Service (or if you prefer Epic Games, then Epic Games As A Service – the steps do not limit to certain gaming platform only – in fact, because its DIY, you are free to choose).
To be able to do the DIY-way method, it requires you to have a decent computer that is able to run (at least) the game you would like to play.
Prerequisites
Before starting, these are the main ingredients required to build your own Cloud Gaming Service to enable you playing any PC games on your smartphone (be it Android or iOS).
| a | Android phone or table or iPhone or iPad or iPod Touch | The main show. |
| b | Computer (Windows or Linux PC) | This is the Host PC. Required to setup your own Cloud Gaming Server. |
| c | Wi-Fi Network | Required for game streaming from Cloud Gaming Server (your PC) to your Android / iOS devices. |
| d | Internet connection | Required for game streaming over the Internet (only if you need it). |
Don’t worry, all the details on how to setup them and other supporting ingredients (read: components / software) and requirements are all detailed on the steps below.
DIY-way steps to turn your smartphone into Steam Deck and play any PC games on it
| The steps written here are tested on: a) Latest iOS – at the time this article is written is iOS 15 and using the iPhone that I currently have – iPhone XR. In case you are not on iOS 15 or iPadOS 15 yet, check the link here to get iOS 15 & iPadOS 15: Here’s how to update iPhone to iOS 15 today (iPad and iPod Touch included!) at JILAXZONE. b) Android 11 – Using Google Pixel 3. c) Latest Windows – at the time this article is written is Windows 11 Pro Insider Preview Build 22471.rs_prerelease. In you are also using Windows and would like to install Windows 11, check the link here to get them installed: Getting Windows 11 and installing on your Computer at JILAXZONE. d) Decent laptop CPU: Intel Core i5-8350U 1.7GHz GPU: Intel UHD Graphics 620 RAM: 8GB e) Decent Wi-Fi Router that runs on 5GHz band. Should you are using different version of Android, iOS or iPadOS and / or different computer OS, the steps may be slightly different but should not deviate too much. Anyway, in case you have questions / issues, feel free to put them down on the comment section down below, I’ll be more than happy to help you. |
Important Legends:
| Term | Description |
|---|---|
| Host PC | Refers to the Computer you are using as the host (brain) of your own Cloud Gaming Service setup. |
There are 15 number of steps you need to go through in order to build your own Cloud Gaming Service, turn your smartphone into Steam Deck and play any PC games from it. But fret not, step 1) to step 14) are one-time setup. So once you have done the one-time setup, all you need to do is to redo step 15 each and every time you want to play PC games on your smartphone.
And while the steps seem long and complicated, but I can assure you, they are not complicated. They are long because I’m trying my best to fully explain every steps in detail on all the required steps, so that not only geeks who can accomplish what I had accomplished here – playing PC games on my smartphone – but anyone from any background can do the same. Anyway, in case any of you stuck on any steps, don’t hesitate to throw me your queries on the comment section down below. I’ll be happy to assist.
High level, these are the required steps:
[Step 1) to step 14) are one-time setup, they need to be done one time only]
1) Download Sunshine to PC
2) Setup Sunshine on PC
3) Download and Install Moonlight app on Android or iOS
4) Open and Setup Moonlight app on Android or iOS to work with Sunshine
5) Connect Game Controller to Android or iOS
6) Setup ZeroTier Network on the web
7) Install ZeroTier One on the Host PC
8) Setup ZeroTier One on the Host PC
9) Install ZeroTier One on Android or iOS
10) Setup ZeroTier One on Android or iOS
11) Complete ZeroTier Network setup on the web
12) Connect Android or iOS to Host PC
13) Install Steam game Launcher on Host PC
14) Install PC Game on Host PC
15) Run PC Game from your smartphone
Detail for each of the steps, refer below.
In case anyone wondering why not just use Steam Link?
While Steam Link is pretty easy to setup, use and configure, but Steam Link has a huge lag issues – so if your game requires less-to-no lag at all, do not use Steam Link. Use the method I’m sharing below. But in case you are ok with a bit of lag when playing your PC game on your smartphone, you can try use Steam Link instead. Check out the steps here: Use Steam Link to Play PC Games on smartphones at JILAXZONE.
Step 1) to Step 12) Read here.
For details of step 1) to step 12) – including all download links, I have detailed and provided them here on this link below.
| Step 1) to Step 12) details | DIY Cloud Gaming with Sunshine: How to setup and use Sunshine GameStream over the Internet to play PC Games & Emulators anywhere on Android and iOS at JILAXZONE. |
You need approximately about 30-40 minutes to complete steps 1) to 12) – depending on how fast you are reading the steps I described and depending on your Internet connection on the downloading the required tools and software.
Just in case you are still wondering, the first 12 steps is to enable your PC as a Cloud Gaming service which you can then play PC games (such as Control, GTA V, League of Legends, Overcooked!) from your smartphone – be it Android or iOS. In case you have no plan to play the game outside your home area, you can skip step 6) to 12) and only do step 1) to 5) then directly proceed to the steps below. Once you have done all the first 12 steps, then continue on subsequent steps below.
Article continues below.
Popular on JILAXZONE today:
Step 13) Install Steam game Launcher on Host PC
I’m using Steam game launcher here only as example (because Steam Deck is also using Steam game launcher). However since this is DIY-way, you can choose any other gaming launchers / platforms / services as you like.
The following step is to be done on your Host PC.
Step 13a) In case you don’t have Steam game Launcher installed on your Computer, do first install Steam game Launcher. Here’s the download link to the Steam game Launcher. In case you have Steam Launcher installed on your Host PC, then you can skip this step. Or if you wish to install Epic Games Launcher instead or some other gaming platforms launcher, so be it – this is DIY, the choice is yours.
| Download link | https://store.steampowered.com/about/ |
Step 13b) Once downloaded, double click the Steam game Launcher installer to start installing it on your Host PC. Follow the on-screen instruction to get Steam game launcher installed on your Host PC. (Or if you are downloading other game launcher, do install and configure them).
Step 14) Install PC Game on Host PC
Once Steam game Launcher (or whatever other game launcher) has been successfully installed on your Host PC, launch it by double-clicking the Steam game Launcher icon.
I’m using Steam game launcher here only as example (because Steam Deck is also using Steam game launcher). However since this is DIY-way, you can choose any other gaming launchers / platforms / services as you like.
The following step is to be done on your Host PC.
Step 14a) Once Steam game Launcher is run, do log in / register to your Steam account.
Step 14b) Once registered/logged in, go into Search bar. Type in “<game you want to play>” and click on “Install” to install the PC game on your Computer (if you have not owned the game, you have to first purchase the game). Follow the on-screen game installation instruction and configure the game to run (E.g.: login into your game account, configure the graphics, sounds, etc.).
Congrats, you have accomplished all one-time setup steps. All the setup steps above, you won’t need to redo them again (except if you are installing a new game on Host PC). You can leave the game running (if you intend to play the game on your smartphone after completing the next step) or close it.
Step 15) Run PC Game from your smartphone
Once you have installed the PC game you want to play on your Host PC, now it’s the time you run the game from within your smartphone. Here’s how you can do it.
If you are planning to play the PC game on your smartphone within the same network as your Host PC, skip step 15a) and 15b).
The following step is to be done on your Host PC.
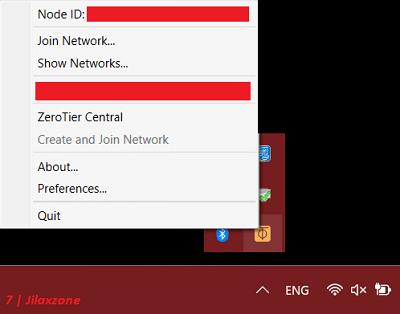
Step 15a) This step is optional and do it only if your smartphone is on different network from your Host PC (E.g.: you are outside your home, while your Host PC with the game installed is at home). Click Windows logo, then type “ZeroTier One” on the Windows search bar. Click on ZeroTier One app to run it. Then from Windows taskbar, look for ZeroTier One app and do right click on it. Click on your ZeroTier network to turn it on.
The following step is to be done on your Android or iOS device.
Step 15b) This step is also optional and do it only if your smartphone is on different network from your Host PC (E.g.: you are outside your home, while your Host PC with the game installed is at home). On your smartphone, go and find ZeroTier One app and tap the app to open it. Switch ON your ZeroTier network.

Step 15c) On your smartphone, find and look for “Moonlight” app, then tap to run it. Once run, tap on “Desktop” to connect to your Host PC. Ensure Moonlight/Sunshine Game Stream is running on your Host PC. In case you have not run Moonlight/Sunshine on your Host PC, go back to Step 2) to activate it.
Step 15d) Once your smartphone connected to your Host PC (you can see your Host PC desktop contents), run “Steam game Launcher” (or whatever game launcher you installed) by double tapping the “Steam game Launcher” icon from your smartphone.
Step 15e) Inside Steam game launcher (or whatever game launcher you installed), go to Library, then find the game you want to play and double tap to start the game.
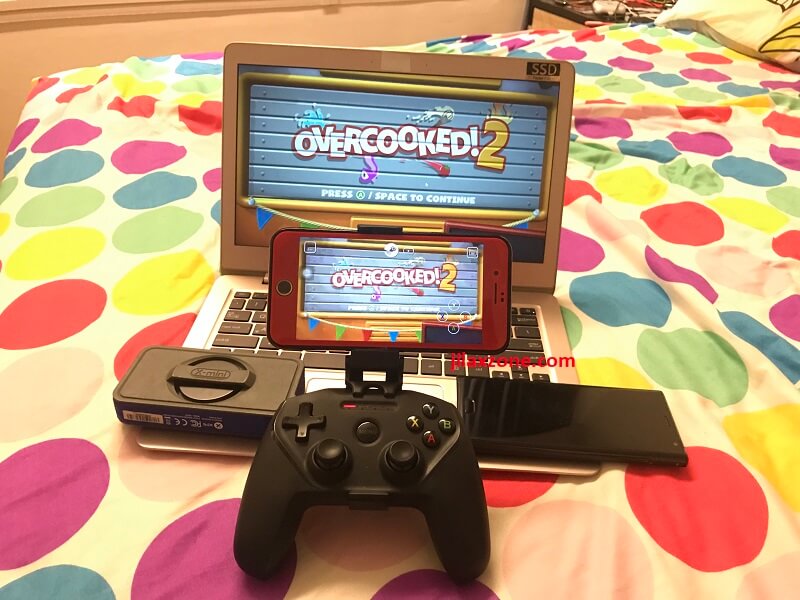
The game will boot, then you can start playing PC game on your smartphone. Congratulation folks, right now you can run and play any PC games on your smartphone – just like how Steam Deck is intended for, but with added benefits and bonus, compare to Steam Deck, your (smartphone) setup is smaller, lighter and able to play anywhere you like (with Wi-Fi or 4G/5G), anytime you like (be sure to keep your Host PC turned on).
The good thing is that, using the Moonlight app on your smartphone, you can straight-away use the built-in virtual controller to navigate inside the game without doing any configuration. In case you are not comfortable with the virtual controller, check out the Controller Recommendation section below on recommended controllers you can use to better-enjoy playing PC games on your smartphone as well as Router Recommendation section in case you are experiencing some lagging streaming PC games from Host PC into your smartphone.
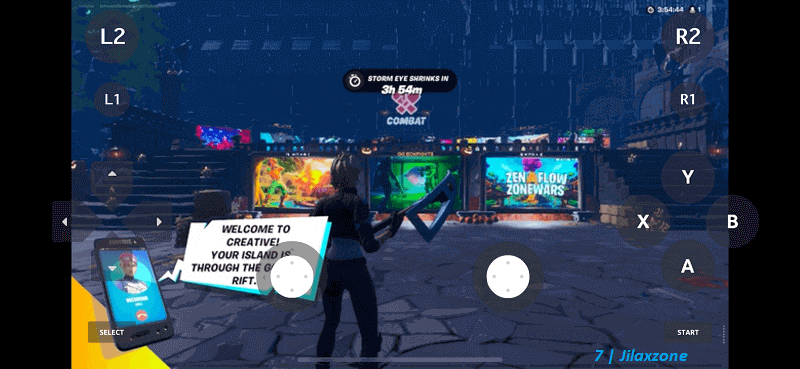
Controller Recommendation
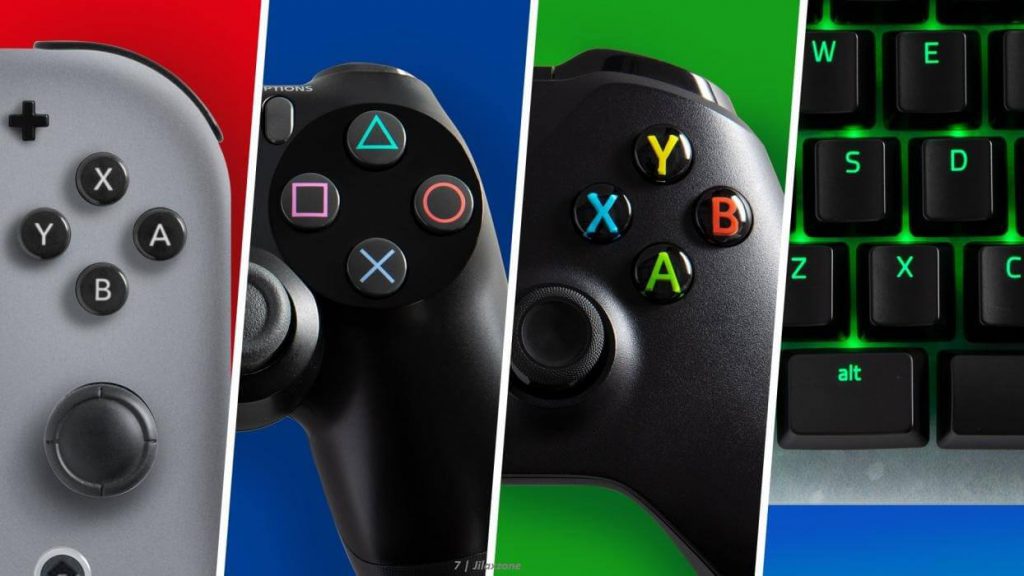
Playing games on Android, iPhone or iPad is always better with controller!
While you can always use the touchscreen of the smartphone to play the games, but for greater fun and enjoyment, I would recommend you to play the games with the Controller using physical buttons – so the experience is (almost) the same like the original. Just in case you need recommendation, here they are. I am personally using Nimbus (on my iPhone), iPega 9083S (on my Android – Pixel 3 & tablet) and DualShock 4 (either iPhone or Android) to play the games.
| Razer Kishi | Best telescopic controller for Android and iPhone. It comes with USB-C (Android) or Lightning connector (iPhone) for passthrough charging as well as better low-latency gaming. In case you need it: Get Razer Kishi for Android on Amazon. Get Razer Kishi for iPhone on Amazon. Get Razer Kishi Hard Carrying Case on AliExpress. |
| GameSir X2 | (Android only) Another great telescopic controller for Android. It comes with USB-C for passthrough charging as well as low-latency gaming. On top of that, you can play run and play Nintendo Switch games on it. Check out here: Egg NS: A working Nintendo Switch emulator for Android at JILAXZONE. In case you need it: Get GameSir X2 for Android on Amazon. Get GameSir X2 for Android on AliExpress. |
| SteelSeries Nimbus+ | (iPhone only) For playing iOS games. I like it because it’s MFi certified – Made for iOS, any controller-compatible games will for sure run with this controller. In case you need it: Get SteelSeries Nimbus+ for iPhone on Amazon. Get Nimbus iPhone clipper on AliExpress. |
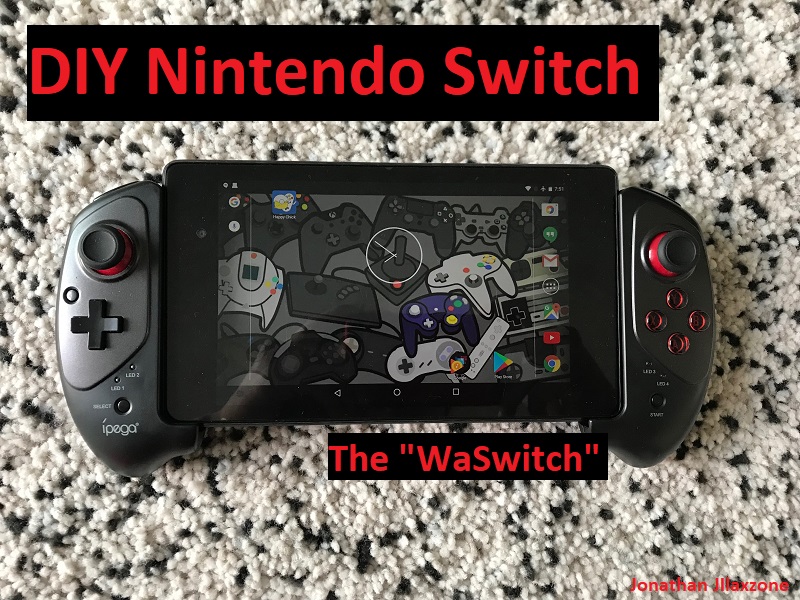
| iPega 9083S | (Android only) Telescopic controller that’s value for money. Not only it compatibles with PC and Android, it also compatible with Nintendo Switch. Use Bluetooth to connect. In case you need it: Get iPega 9083S on Amazon Get iPega 9093S on AliExpress Check it out here to see iPega 9083S in action: YouTube link |
| Xbox Series X|S Wireless Controller | Great controller from Xbox compatible with your Xbox (of course!) as well as Windows PC, Android and iOS, recommended for those with big hands. Read here for pairing Xbox Series X|S Controller with your iPhone at JILAXZONE. In case you need it: Get Xbox Series X|S Wireless Controller on Amazon. Get Xbox Series X|S Wireless Controller Hard Carrying Case on AliExpress. |
| PS5 DualSense | Awesome controller from PlayStation compatible with your PS5 (of course!) as well as Android and iOS, recommended for those with smaller hands. Read here for pairing PS5 DualSense Controller with your iPhone at JILAXZONE. In case you need it: Get PS5 DualSense on Amazon. Get PS5 DualSense Hard Carrying Case on AliExpress. |
| PS4 DualShock | While DualSense is the latest PlayStation controller, but doesn’t mean DualShock 4 is bad. DualShock 4 is indeed one of the cheaper alternative to get into gaming on your Android and iOS, recommended for those with smaller hands. In case you need it: Get PS4 DualShock 4 on Amazon. Get PS4 DualShock 4 on AliExpress. |
| Xbox One Wireless Controller | This is the previous generation of Xbox Controller. Although previous generation, it’s still a great controller to use with your Xbox One (of course!) as well as Windows PC, Android and iOS. This controller is recommended for those with big hands. The main controller appeal is the fact that it’s much cheaper than the Xbox Series X|S wireless controller. In case you need it: Get Xbox One Controller on Amazon. Get Xbox One Controller on AliExpress. |

Note: If you buy anything from Amazon / AliExpress using links above, I will earn a small commission at no extra cost charged on your purchases.
Gaming Router Recommendation
In case you are experiencing some lags streaming your Host PC into your smartphone, here are some recommendations on the best gaming routers out there you can get to improve the less-to-no lagging gaming experiences.

| TP-Link – Archer AX11000 Tri-Band Wi-Fi 6 Router | One of the fastest Wi-Fi 6 router, loaded with gamer-centric UI and features. In case you need it: Get TP-Link Archer AX11000 on Amazon |
| ASUS ROG Rapture Wi-Fi 6 Gaming Router (GT-AX11000) | Another fastest Wi-Fi 6 router with lots of gamer-friendly features that comes with Tri-Band 10 Gigabit Wireless Router, 1.8GHz Quad-Core CPU, WTFast, 2.5G Port, AiMesh Compatible, Included Lifetime Internet Security, AURA RGB. In case you need it: Get ASUS ROG Rapture GT-AX11000 on Amazon Get ASUS ROG Rapture GT-AX11000 on AliExpress |
| Netgear Nighthawk Pro Gaming XR500 | This elite gaming router deliver a fast 2.2Gbps speed, MU-MIMO support and unique gaming features like location-based connection filtering and QoS. In case you need it: Get Netgear Nighthawk Pro Gaming XR500 on Amazon |

Note: If you buy anything from Amazon / AliExpress using links above, I will earn a small commission at no extra cost charged on your purchases.
Bring it all together
What a long article this is! But like I mentioned eariler, while the steps are long and seemed complicated, but I can assure you, they are not complicated. They are long because I’m trying my best to fully explain every steps in detail on all the required steps, so that not only geeks who can accomplish what I had accomplished here – playing PC games on my smartphone – but anyone from any background can do the same.
Let me know in the comment section down below if you have successfully accomplish the steps above (either Method #1 or Method #2) and / or if you have queries / difficulties on setting up your smartphone to be Steam Deck alternative. I’ll be happy to assist.
Do you have anything you want me to cover on my next article? Write them down on the comment section down below.
Alternatively, find more interesting topics on JILAXZONE:
JILAXZONE – Jon’s Interesting Life & Amazing eXperience ZONE.
Hi, thanks for reading my curated article. Since you are here and if you find this article is good and helping you in anyway, help me to spread the words by sharing this article to your family, friends, acquaintances so the benefits do not just stop at you, they will also get the same goodness and benefit from it.
Or if you wish, you can also buy me a coffee:
Thank you!
Live to Share. Share to Live. This blog is my life-long term project, for me to share my experiences and knowledge to the world which hopefully can be fruitful to those who read them and in the end hoping to become my life-long (passive) income.
My apologies. If you see ads appearing on this site and getting annoyed or disturb by them. As much as I want to share everything for free, unfortunately the domain and hosting used to host all these articles are not free. That’s the reason I need the ads running to offset the cost. While I won’t force you to see the ads, but it will be great and helpful if you are willing to turn off the ad-blocker while seeing this site.

